Photo Gallery under construction.
Hole Statistics
Ft.
|
T-Box |
Approach |
Basket |
Rock Face
Hole #1
Distance: 303
Elevation: -4
Plays Like: 295
|
.jpg) |
.jpg) |
.jpg) |
Robber's Roost, CA
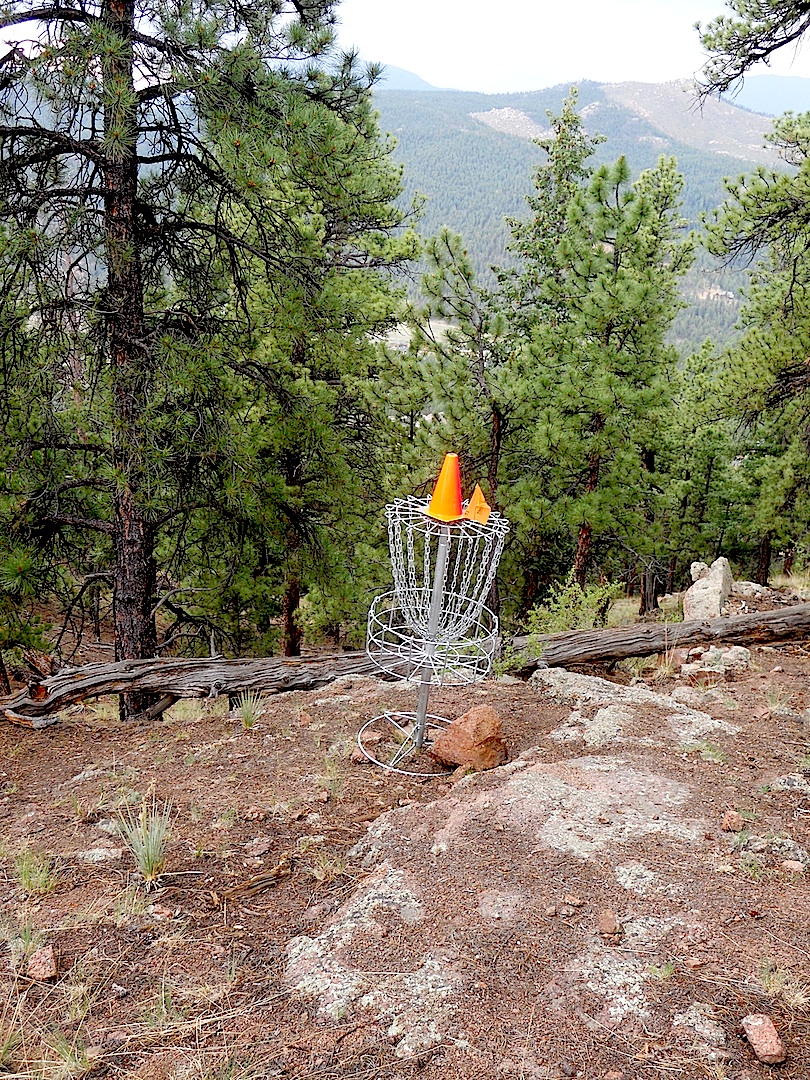
Hole #2
Distance: 155
Elevation: -22
Plays Like: 111 |
.jpg) |
.jpg) |
.jpg) |
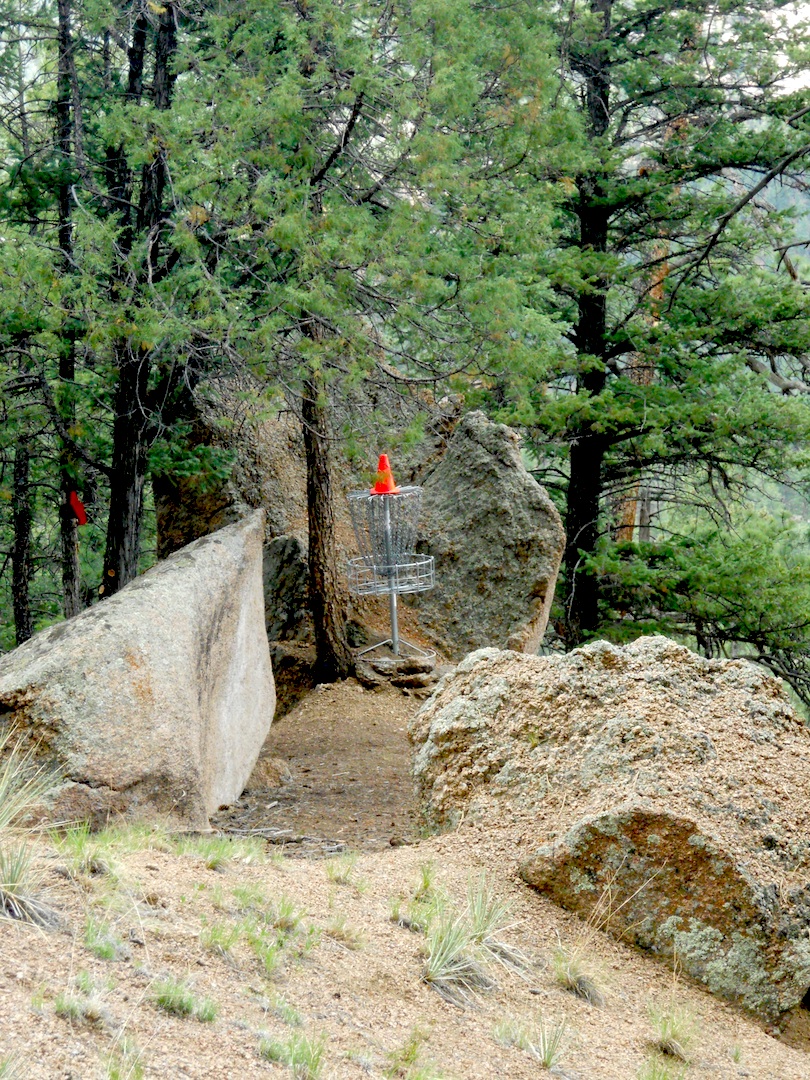
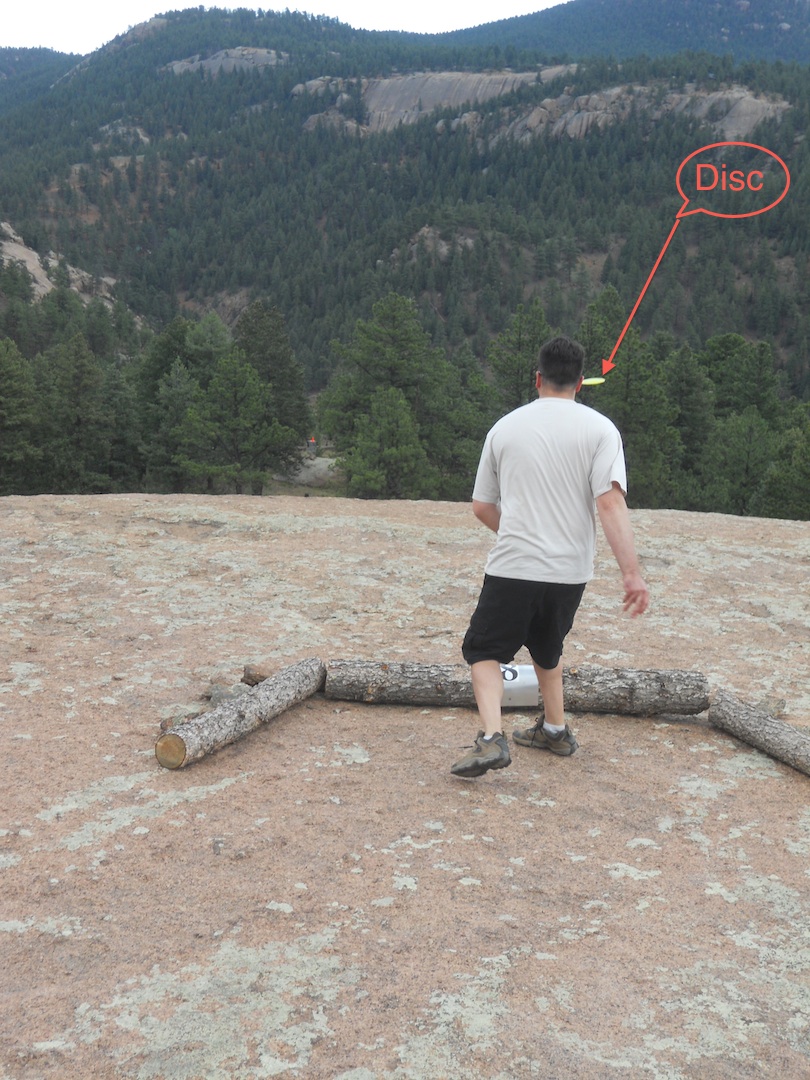
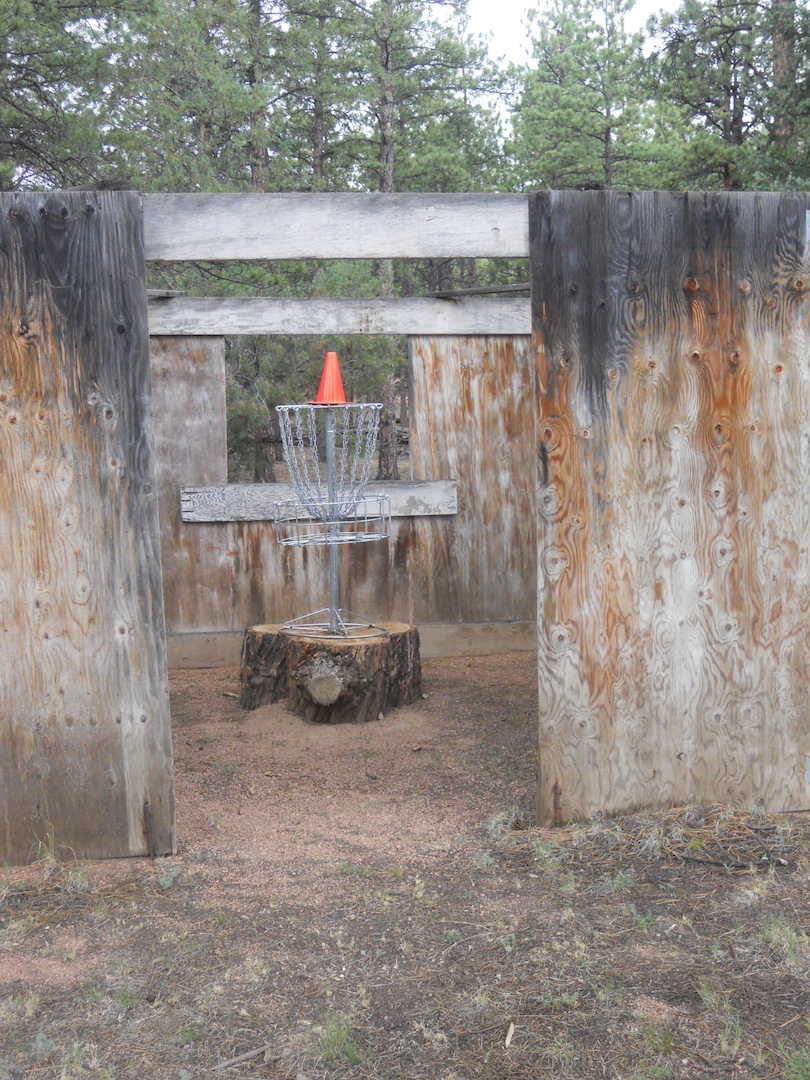
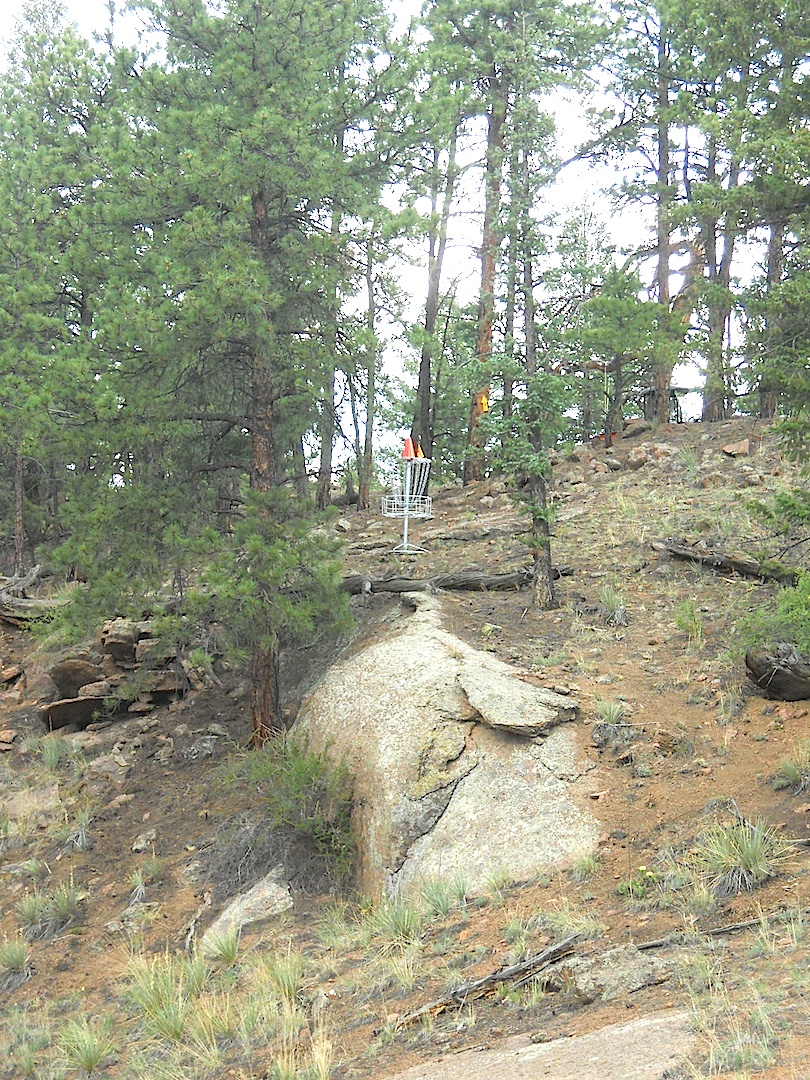
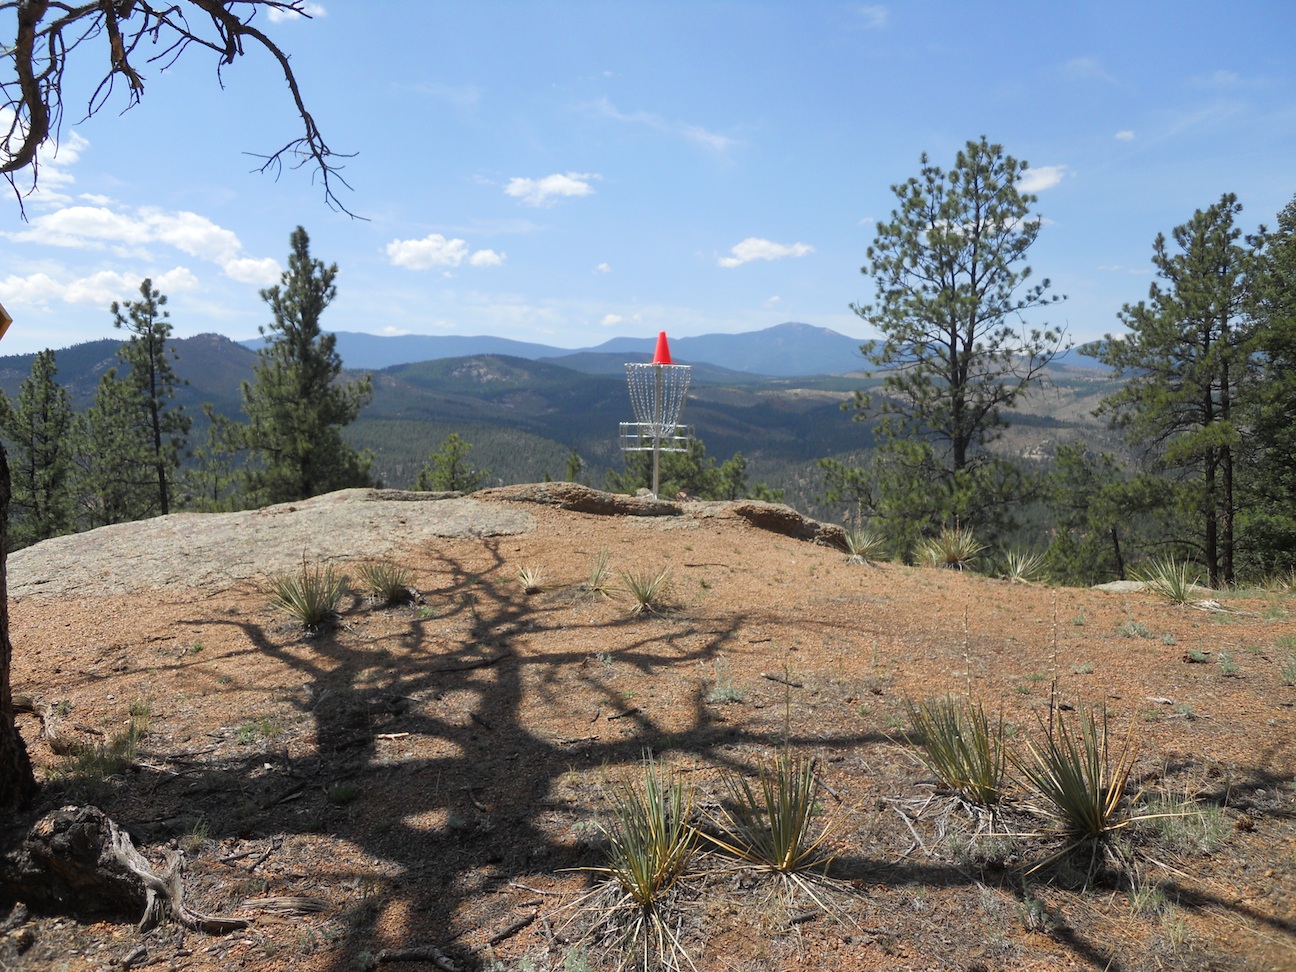
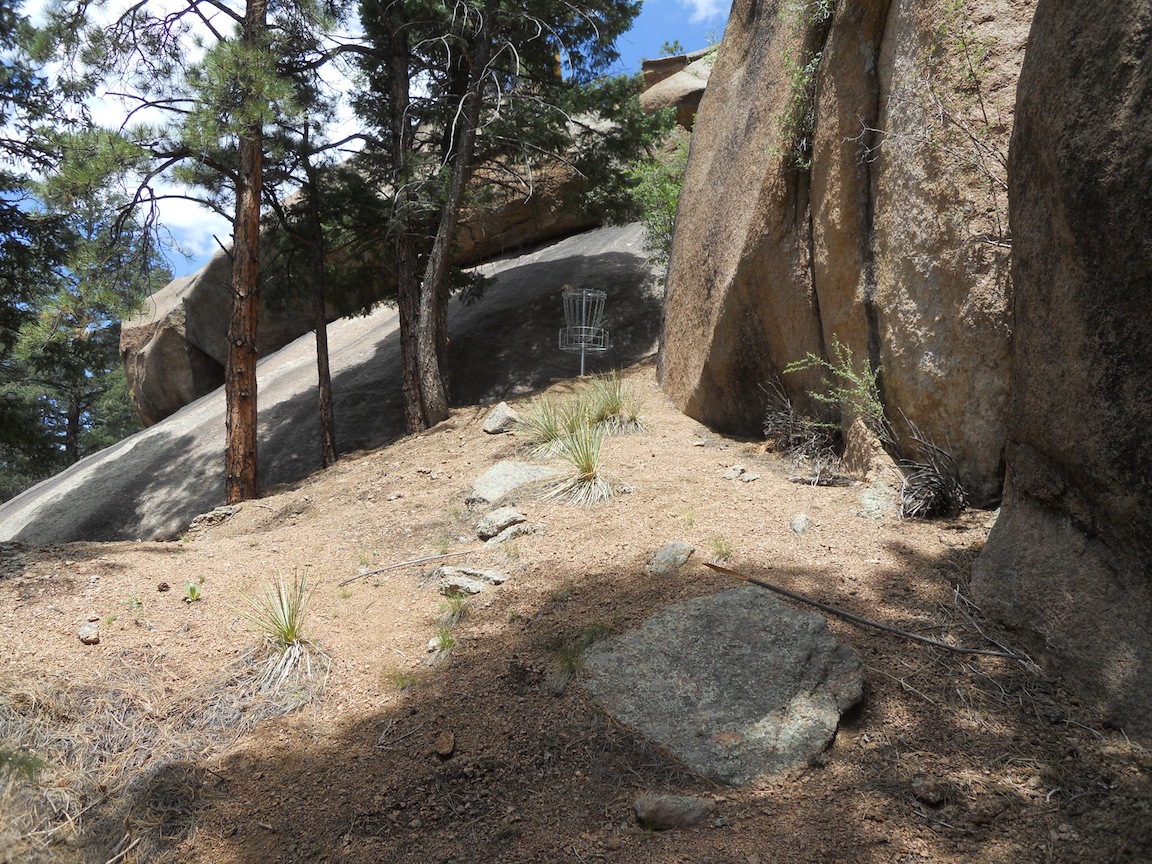
Too Stoned
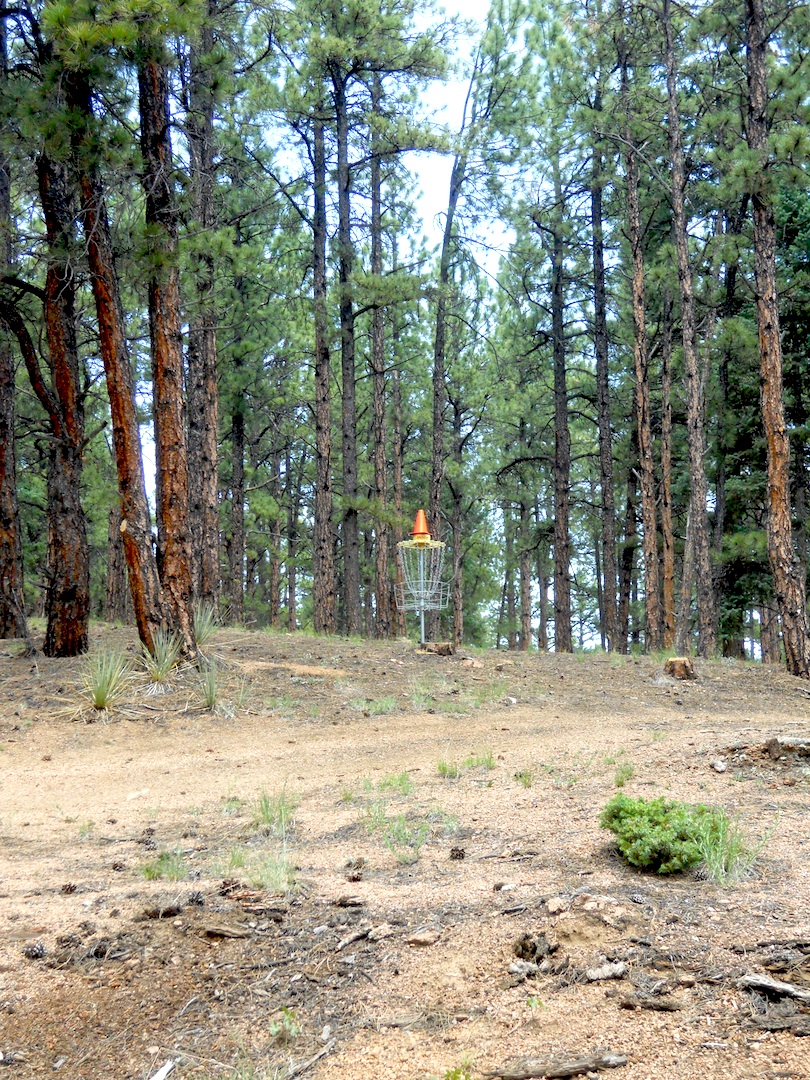
Hole #3
Distance: 254
Elevation: 24
Plays Like: 326 |
.jpg) |
.jpg) |
.jpg) |
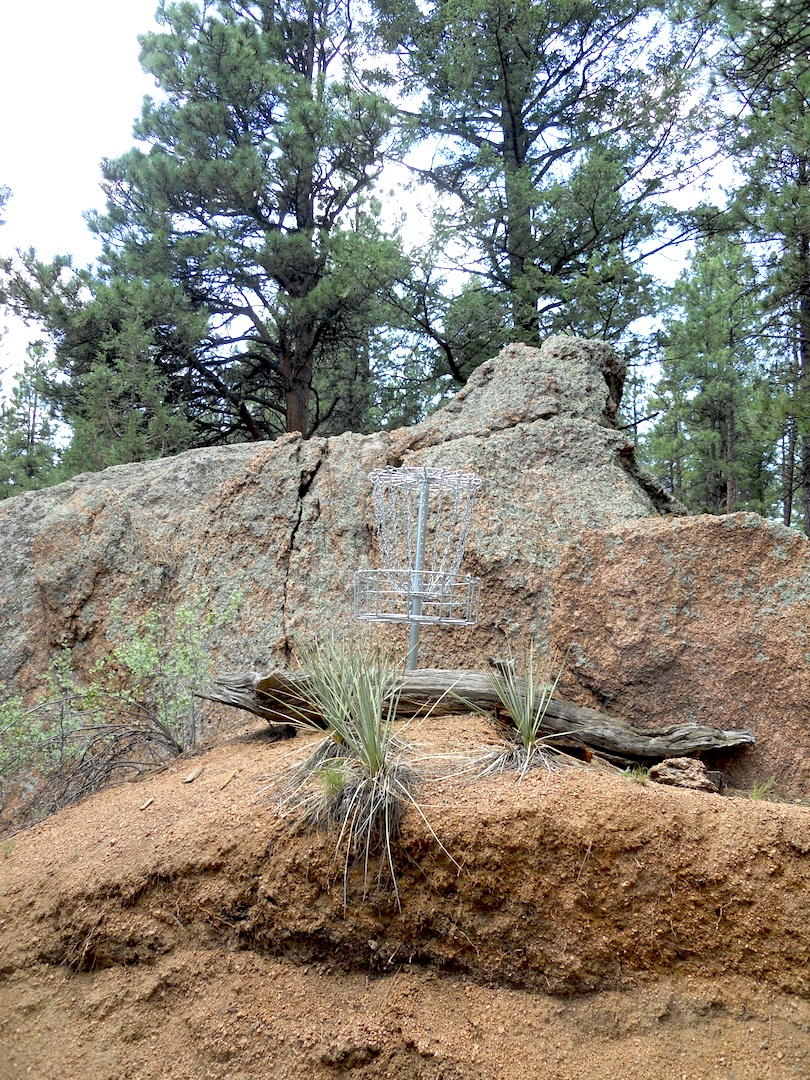
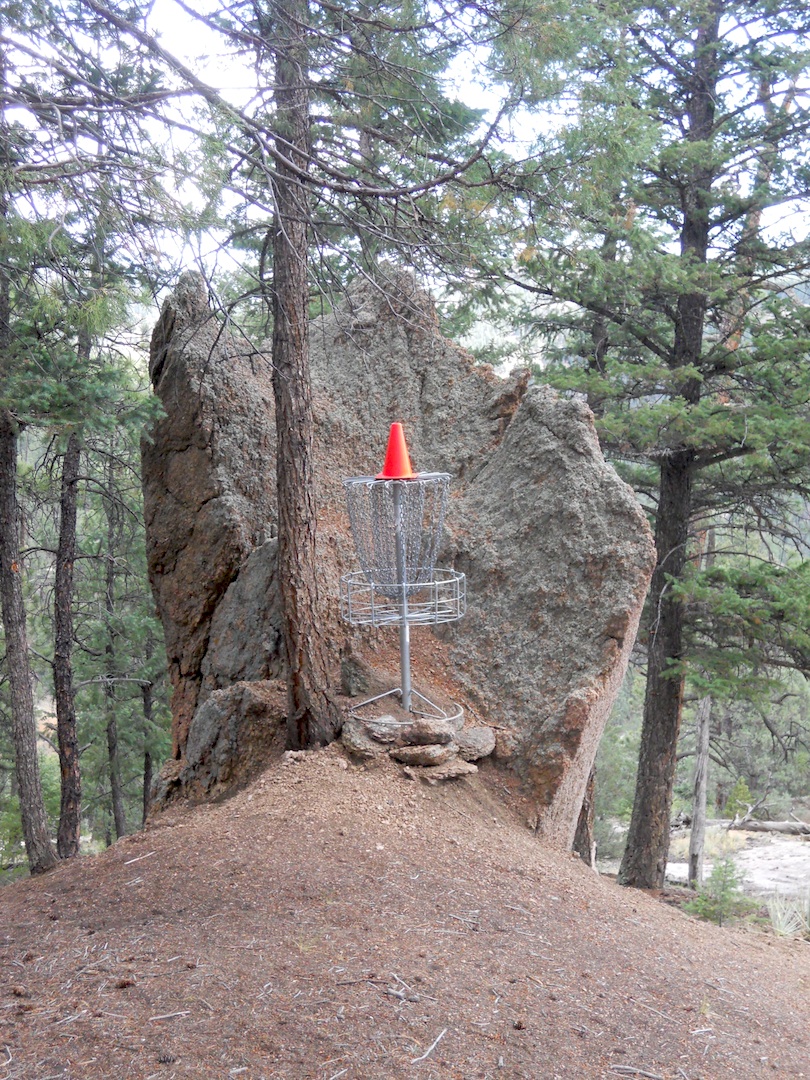
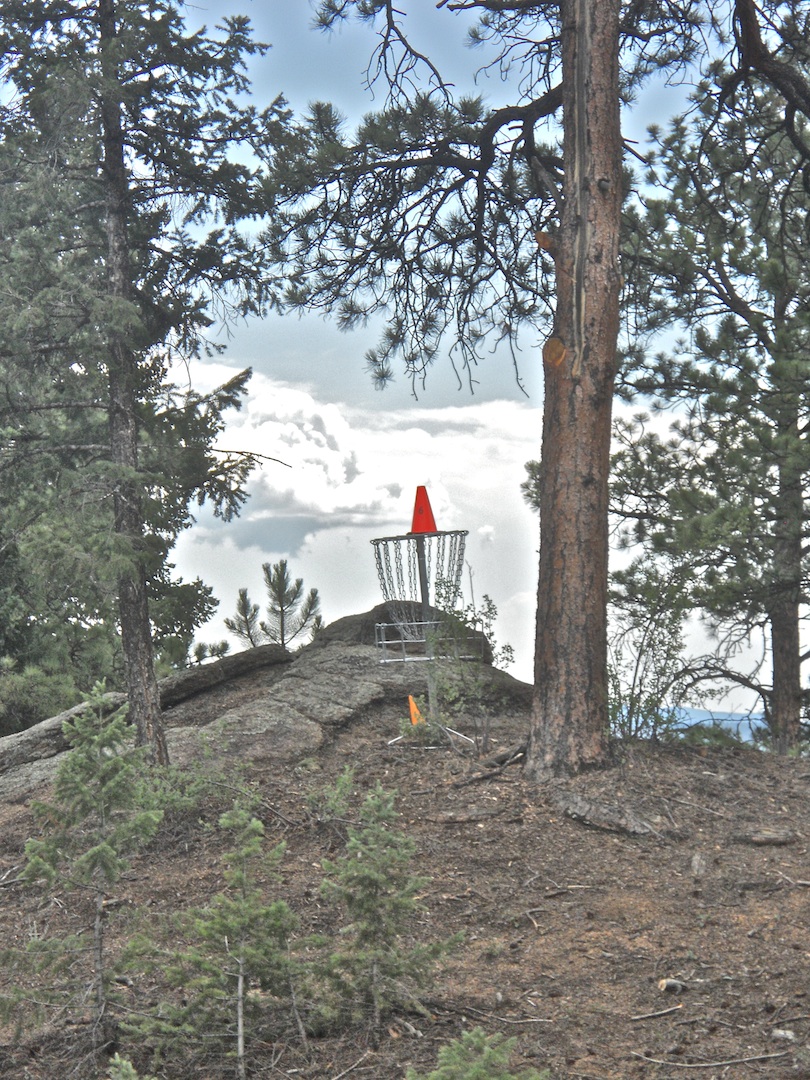
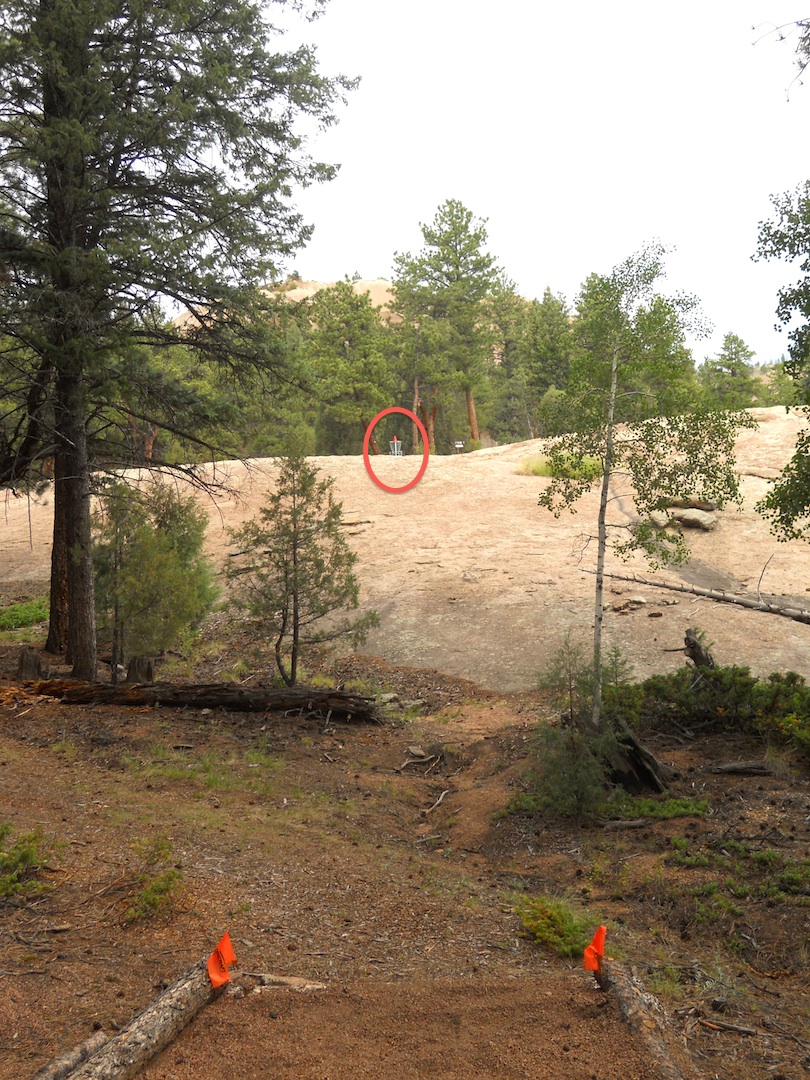
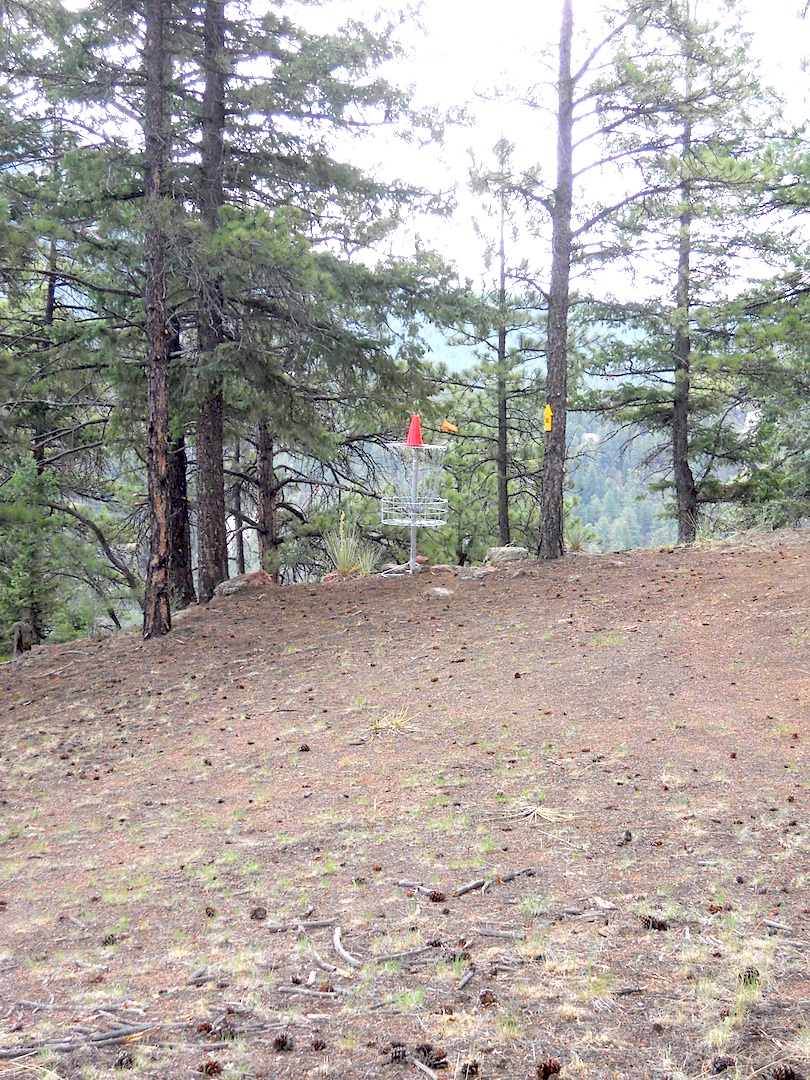
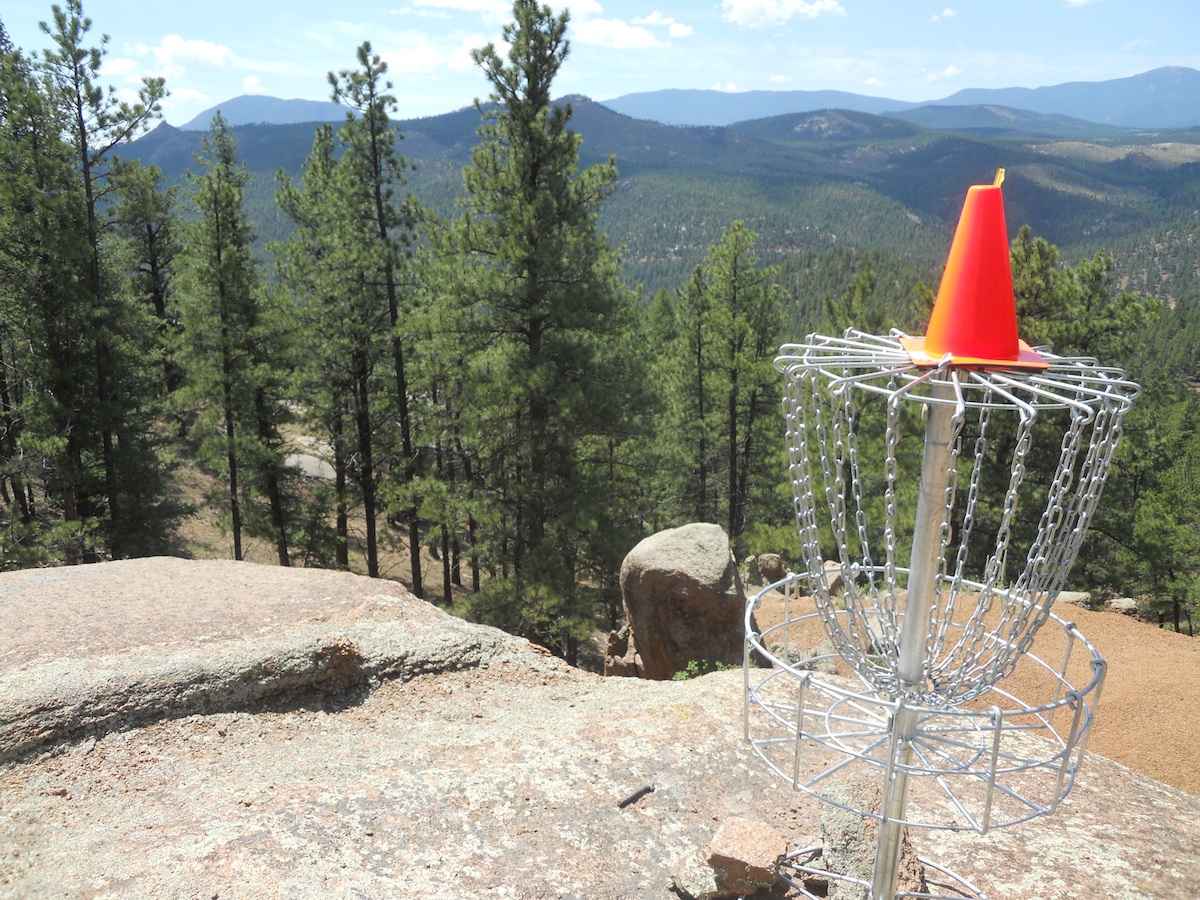
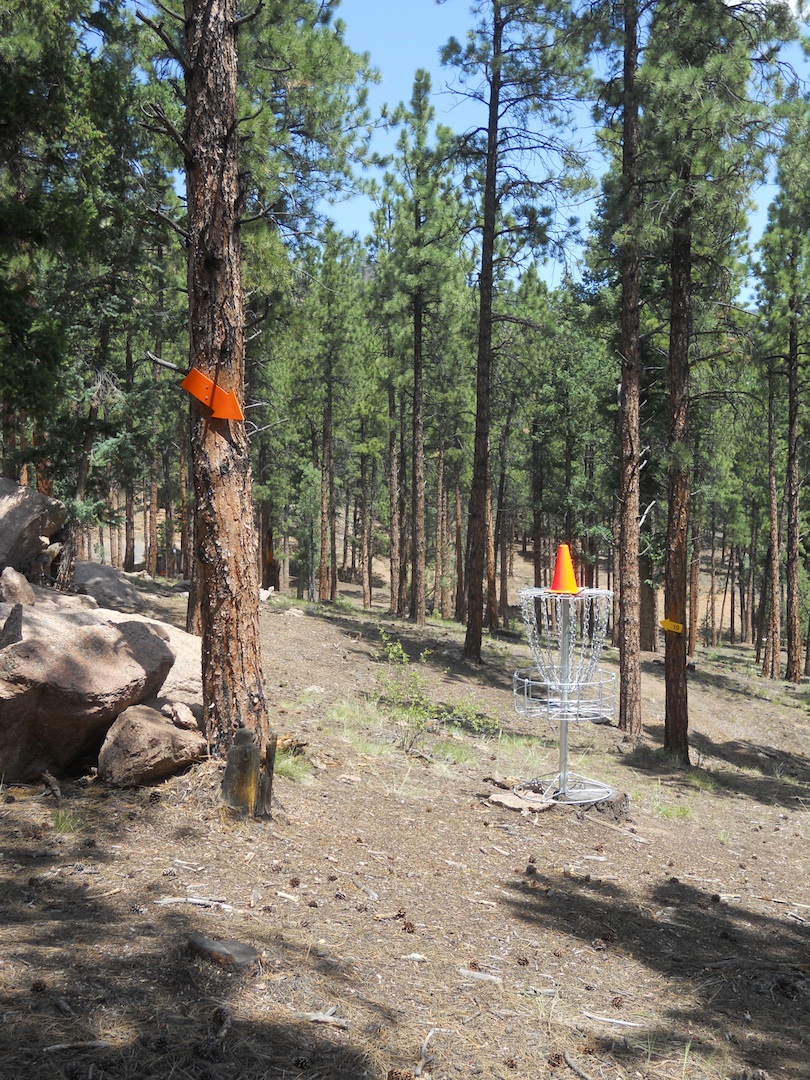
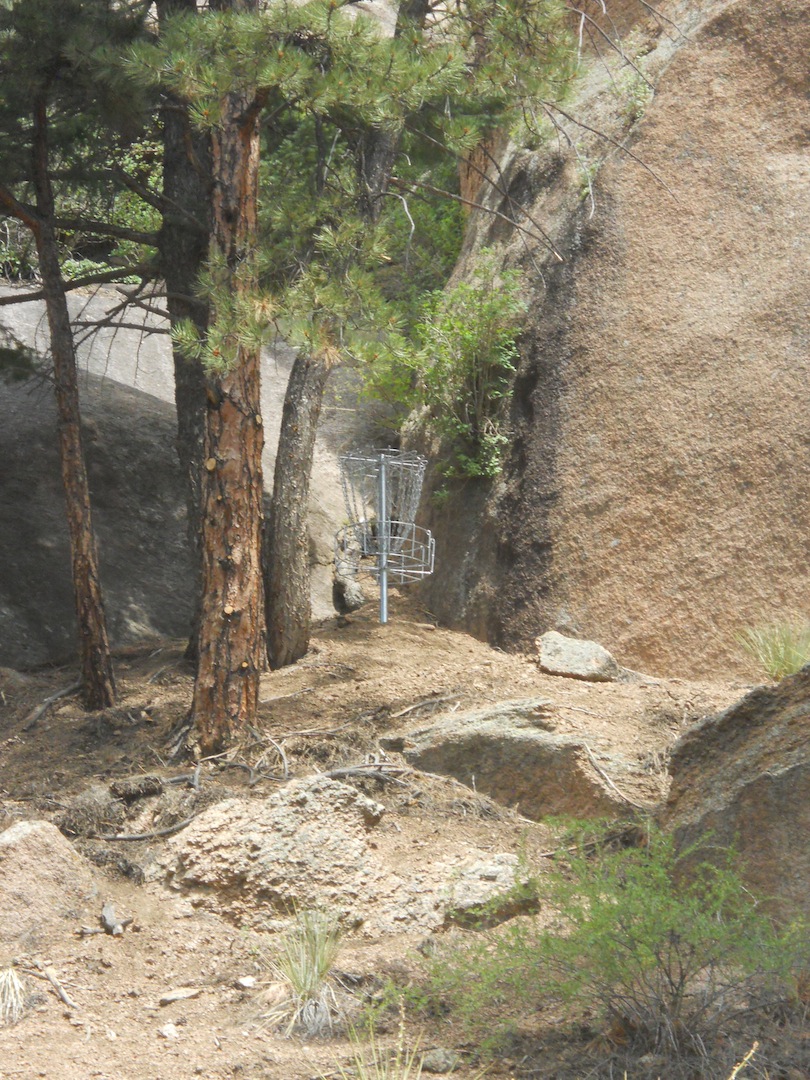
Too Stoned
Hole #3
Other Photos |
.jpg)
Backside of #3 Basket looking toward T-Box.
|
|
|
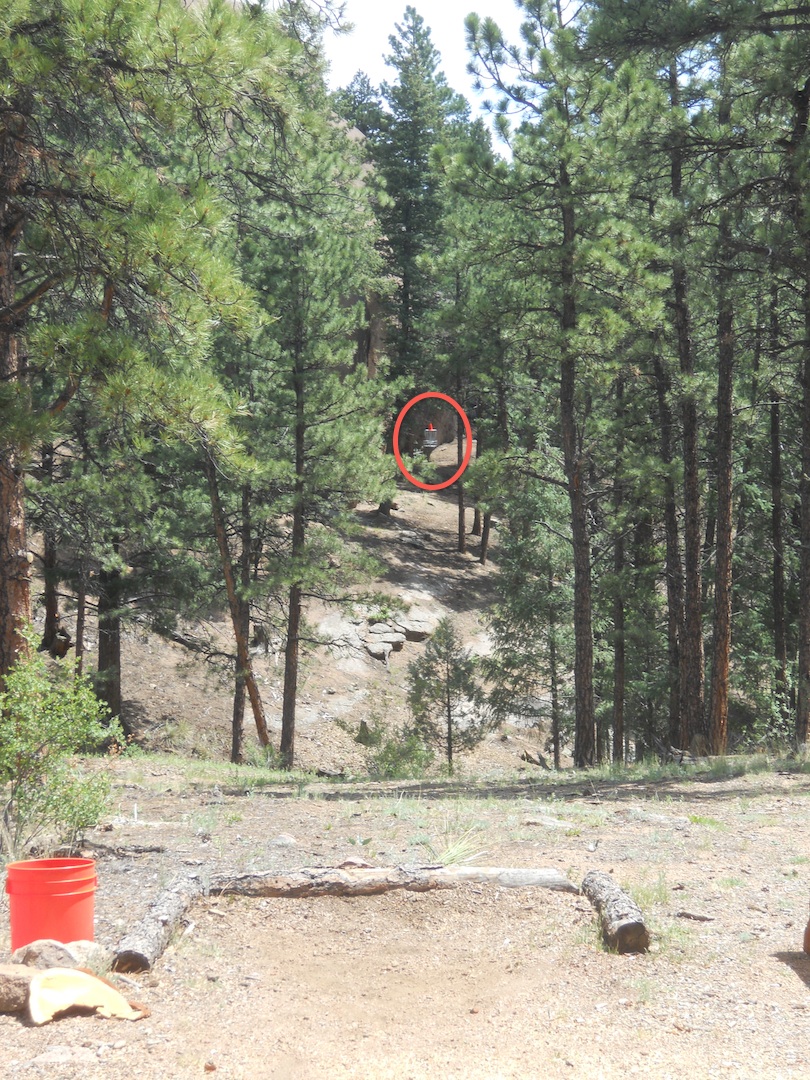
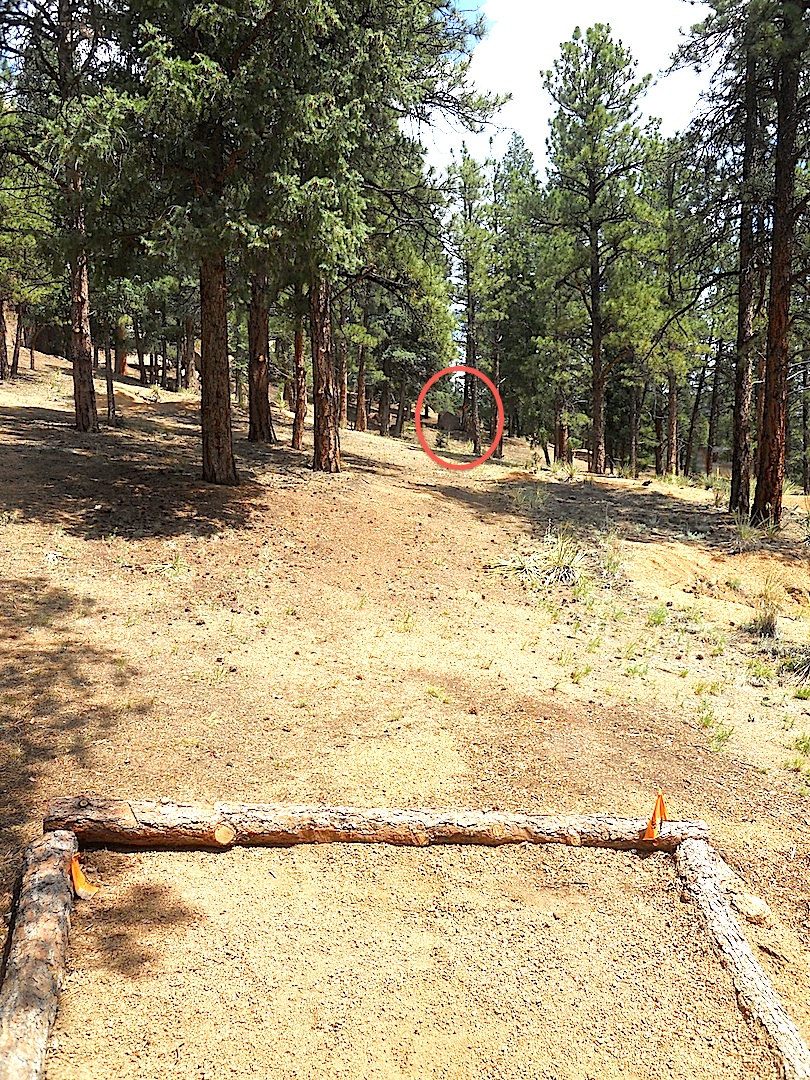
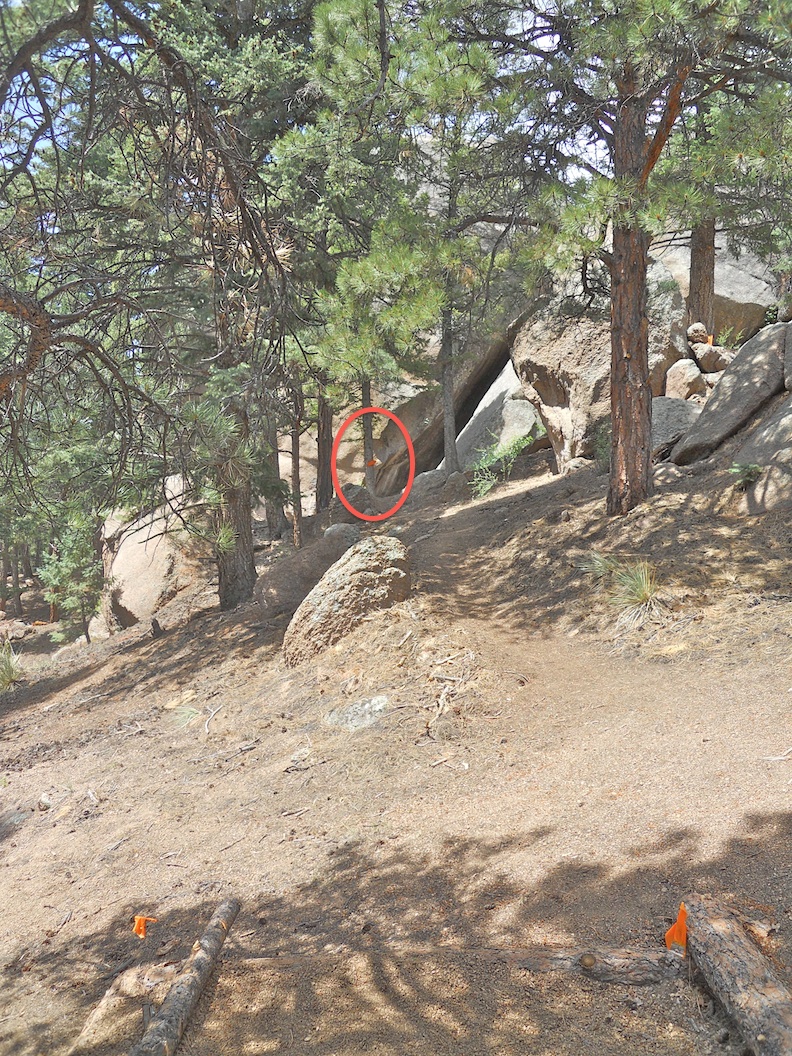
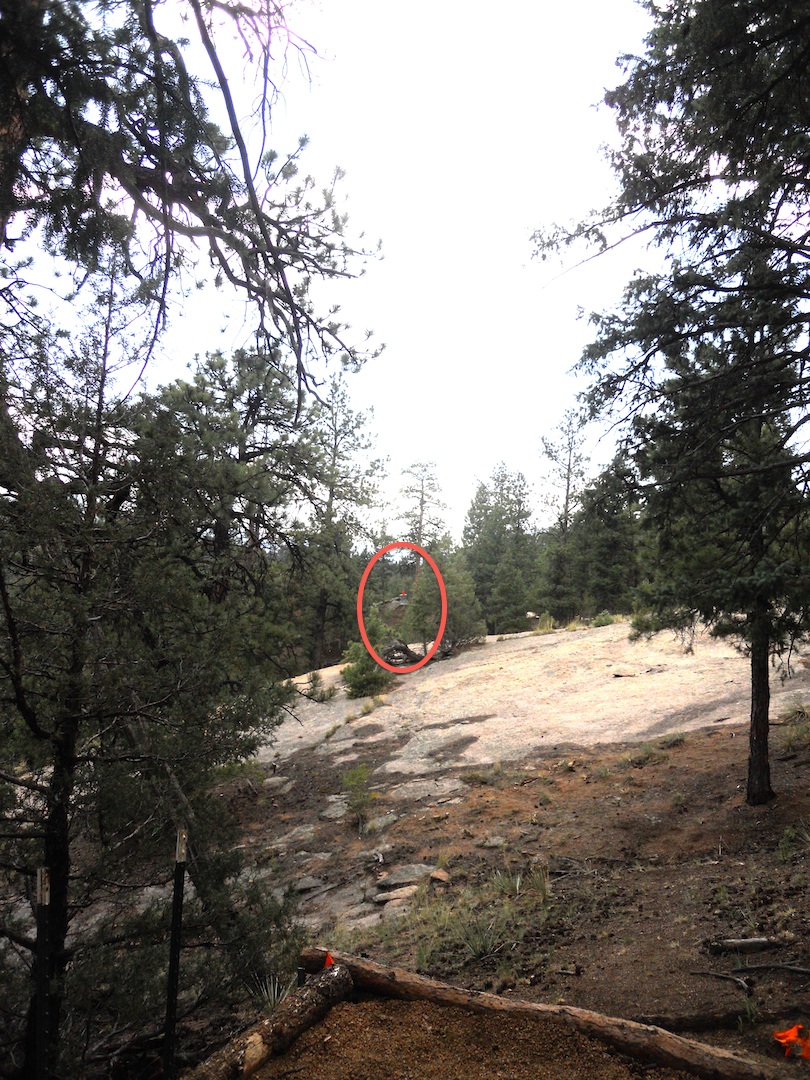
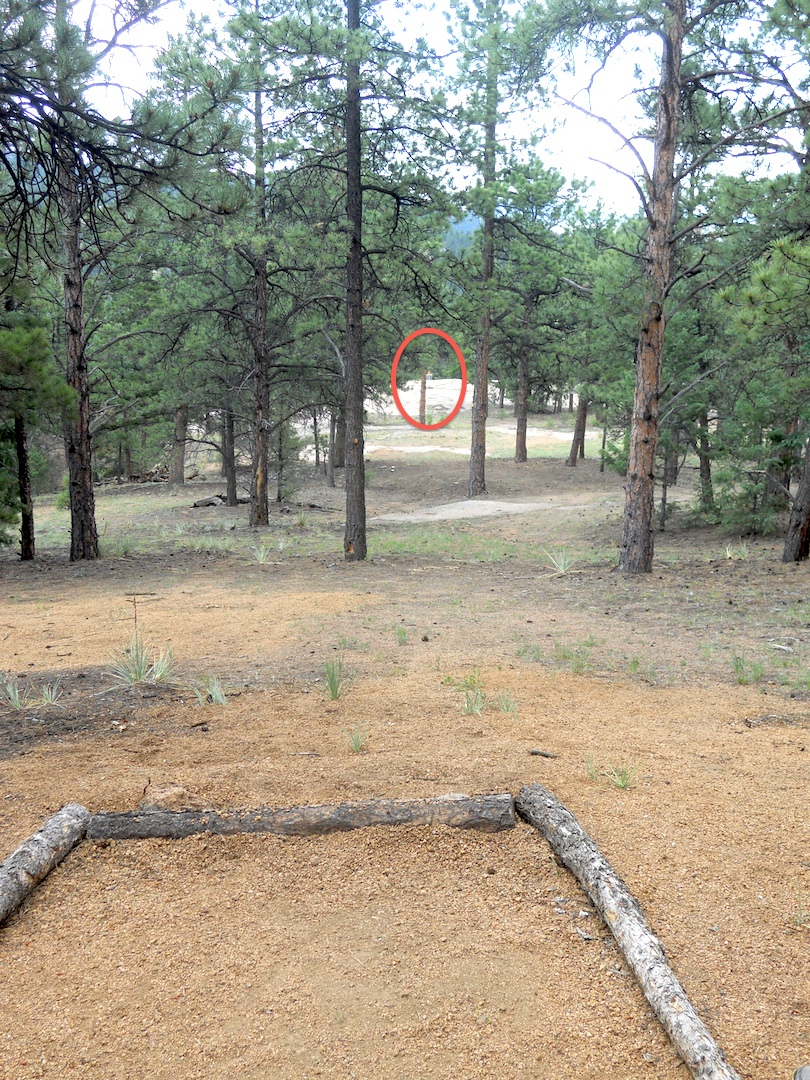
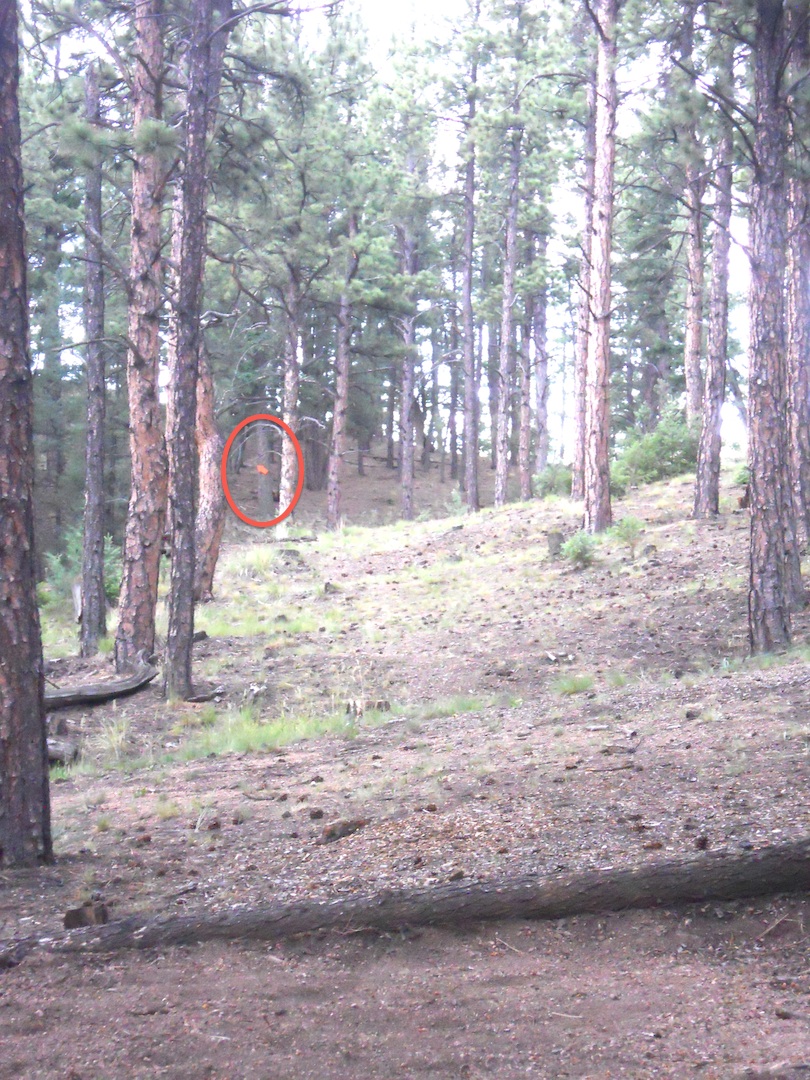
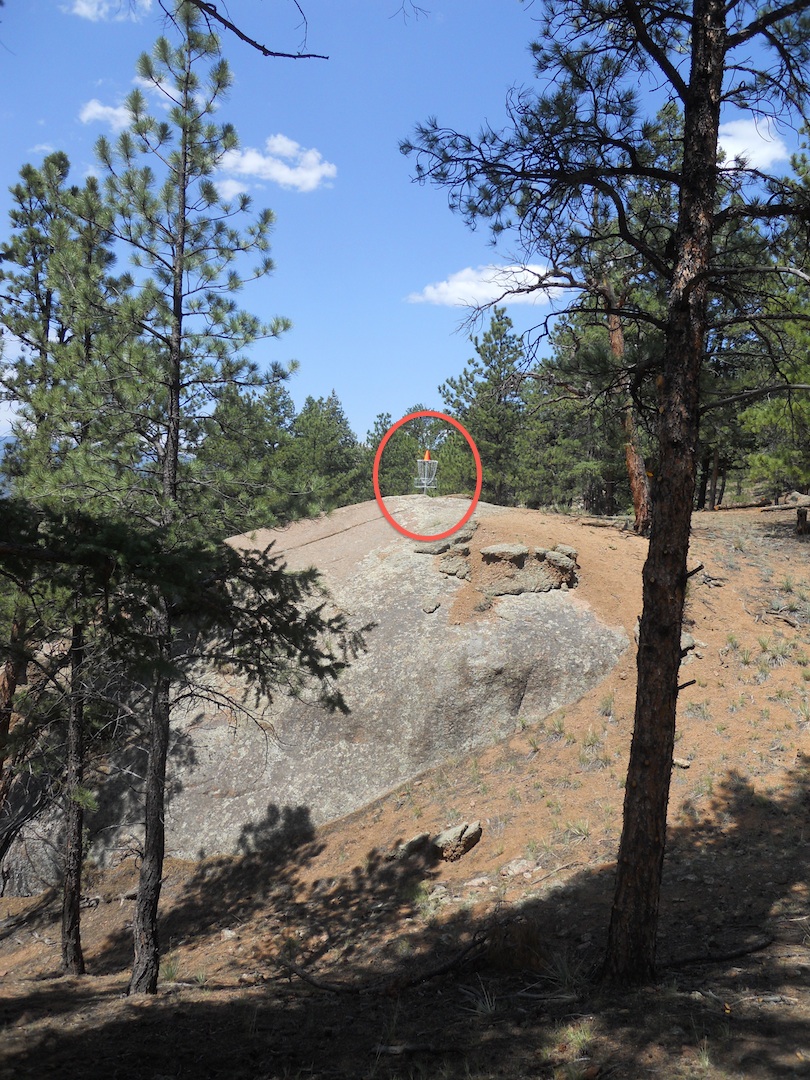
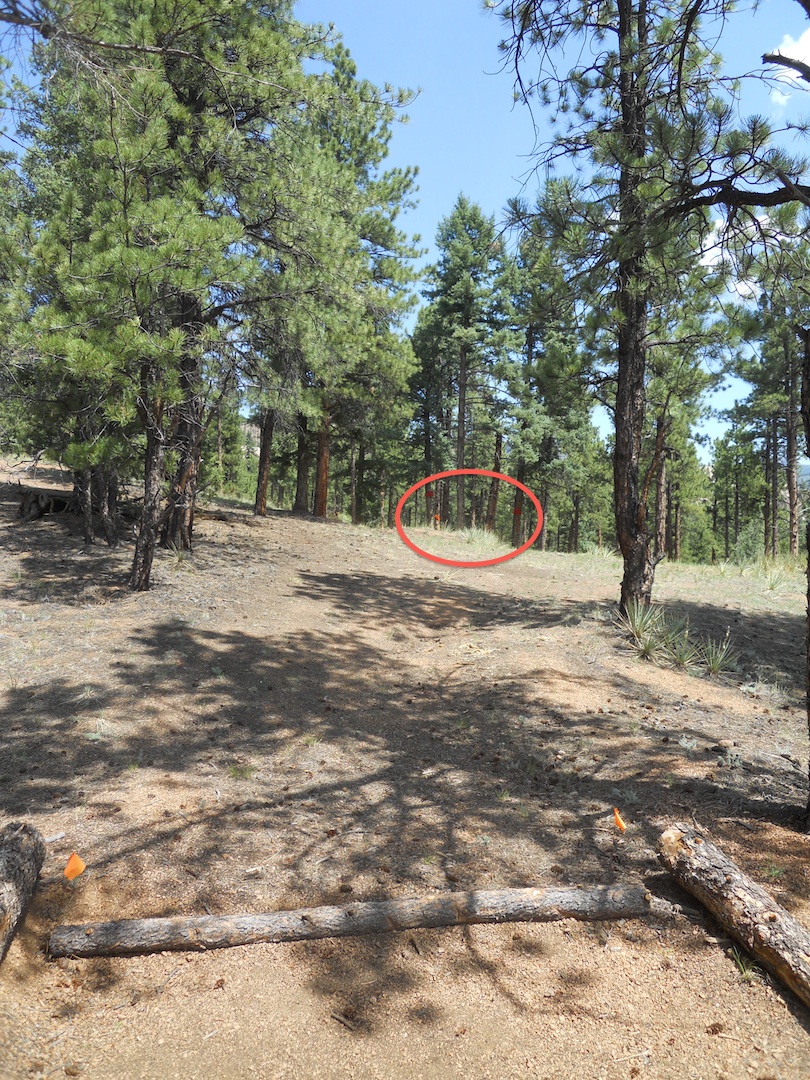
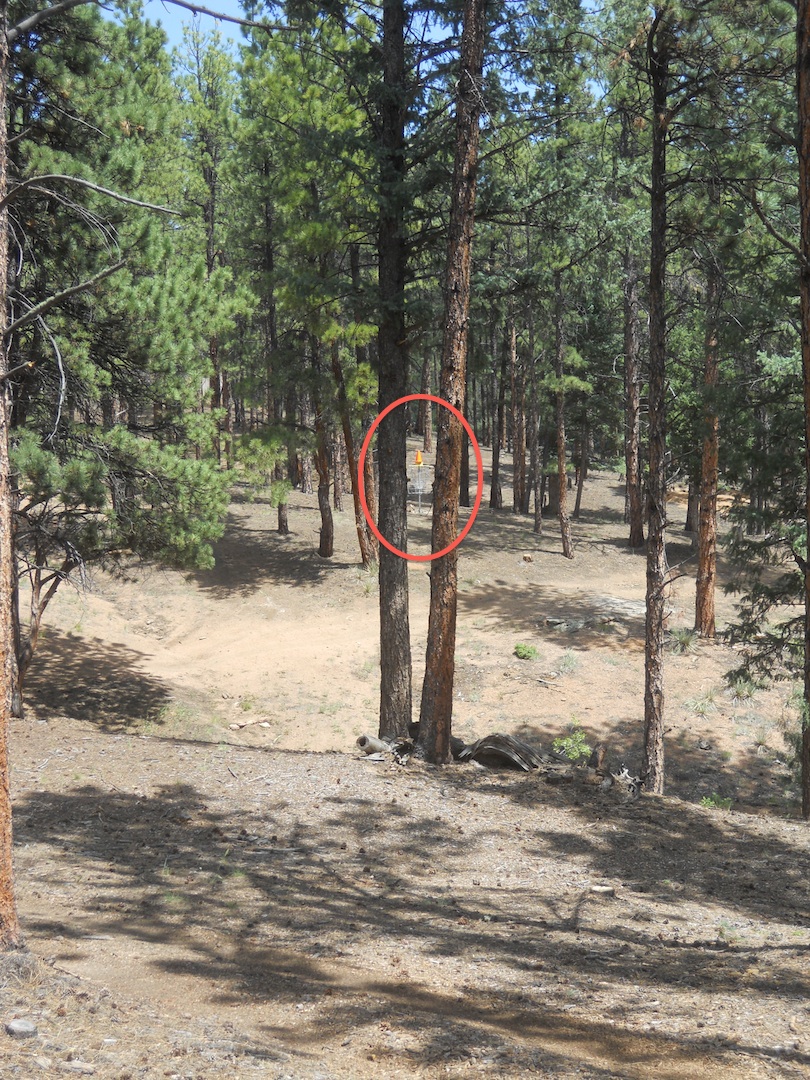
Cave
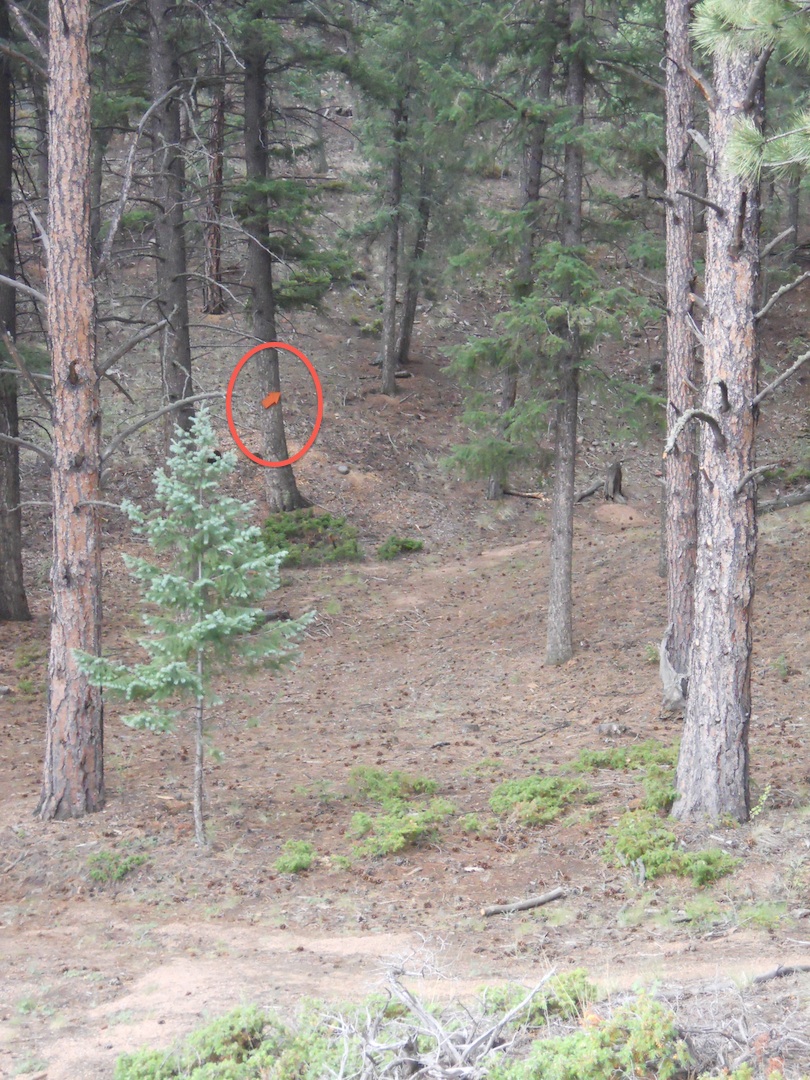
Hole #4 *
Distance: 117
Elevation: 21
Plays Like: 180 |
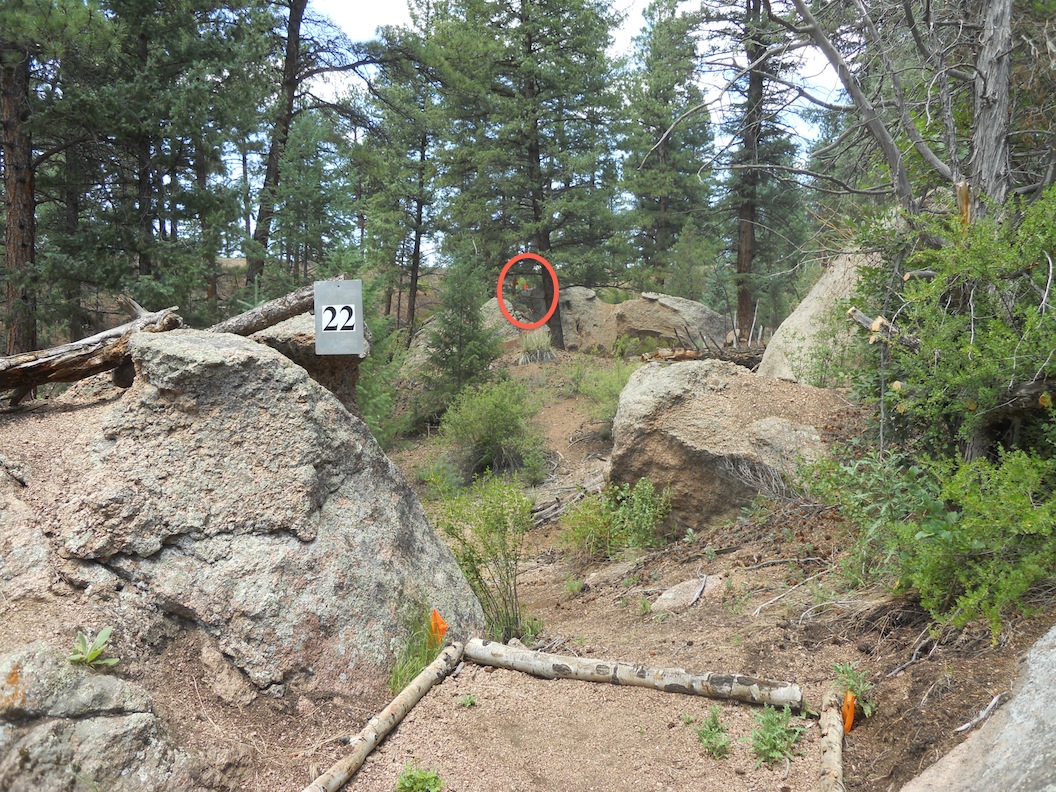
.jpg)
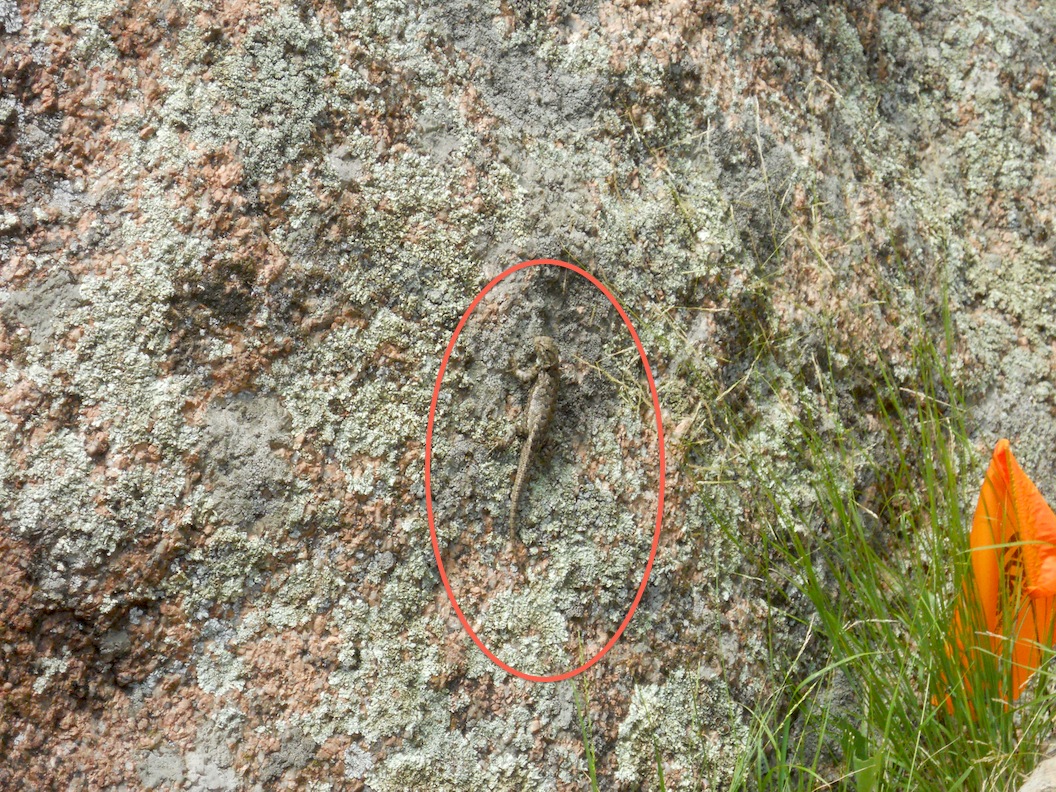
The circle in the photo highlights the orange arrow pointing at the basket. All blind shots have similar orange arrows.
|
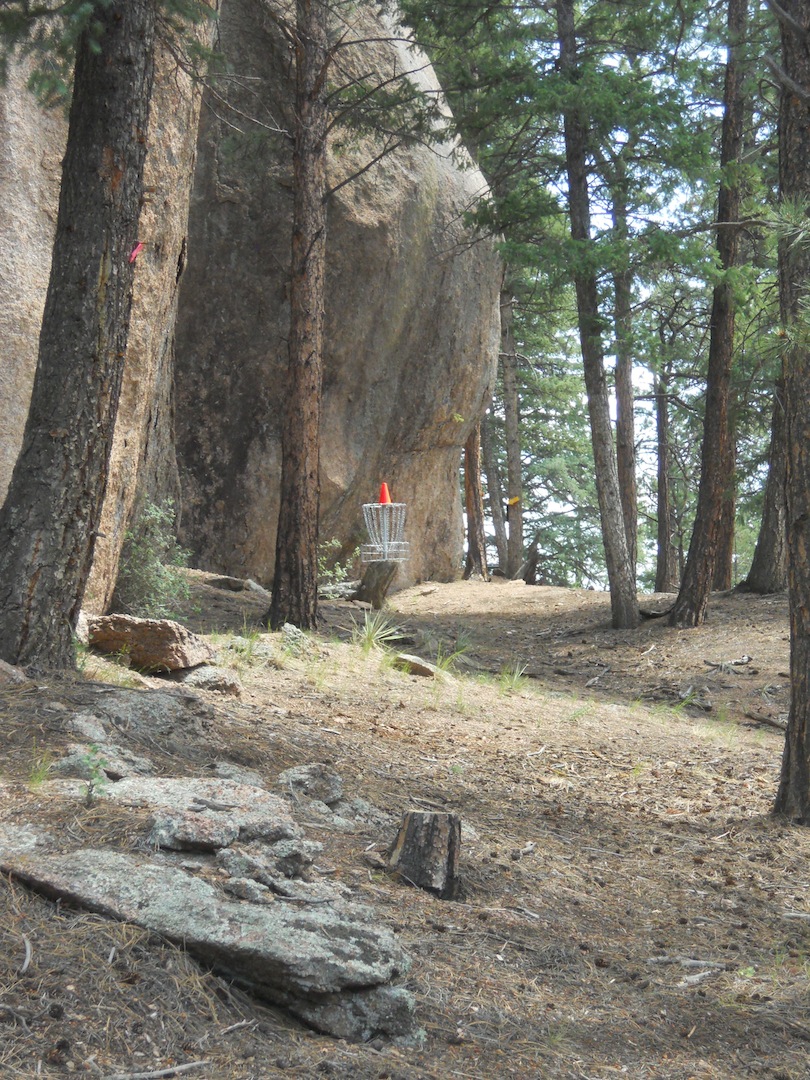
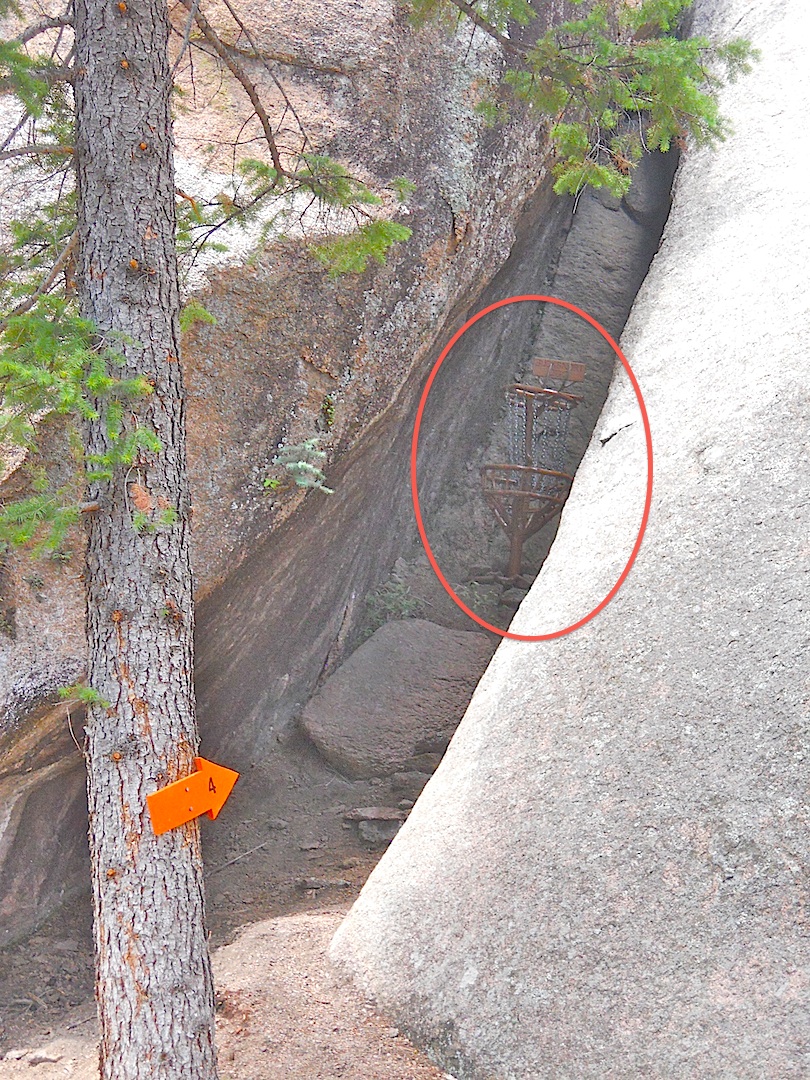
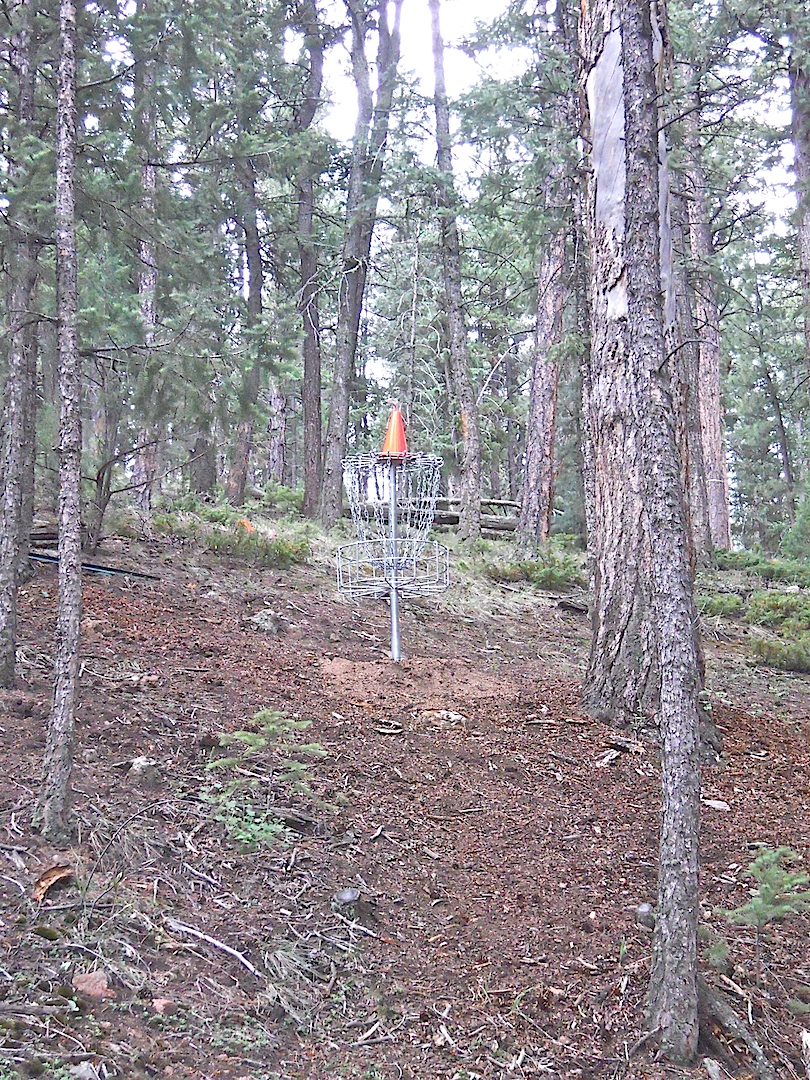
.jpg) |
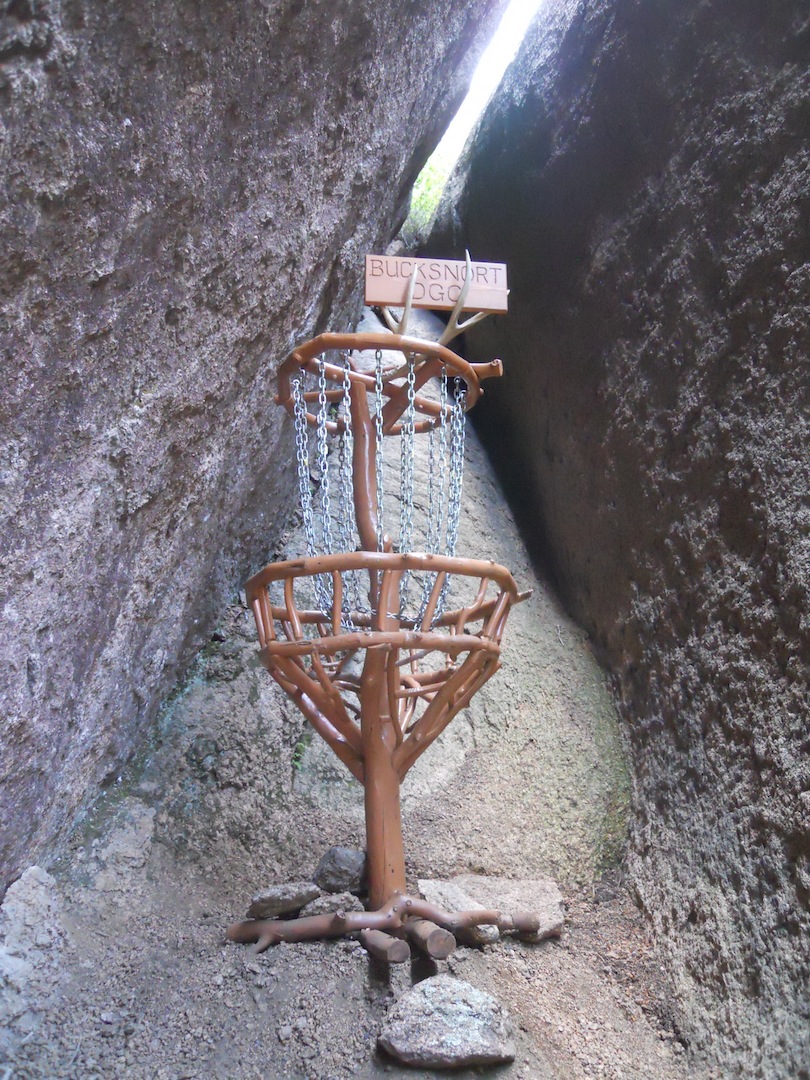
.jpg)
Custom made wood basket by Mark Hilbert
|
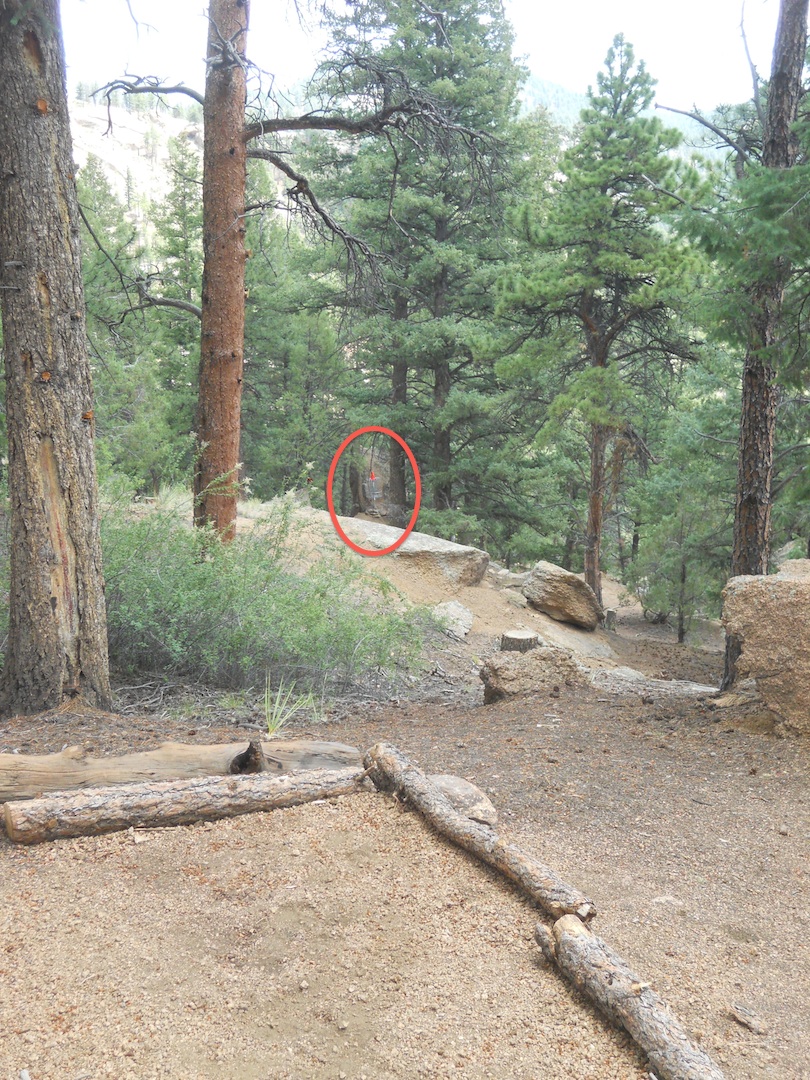
| |
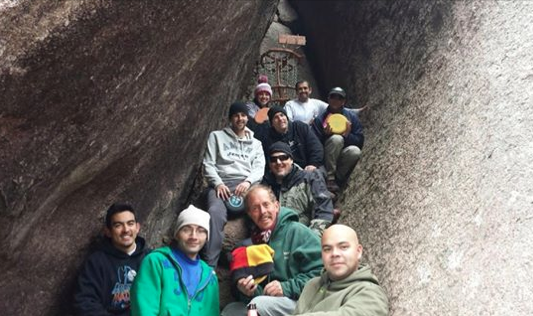
A group of 11 (10 and the photographer) pose on the steps into the cave at #4
|
|
|
Throne
Hole #5
Distance: 177
Elevation: -36
Plays Like: 104 |
.jpg) |
.jpg) |
.jpg) |
Throne
Hole #5
Other Photos |
.jpg)
Backside of the Throne. You can kiss your birdie goodbye if your drive ends here.
|
|
|
Rest Stop
Hole #6
Distance: 231
Elevation: -3
Plays Like: 226 |
.jpg) |
.jpg) |
.jpg)
Basket from the right side.
|
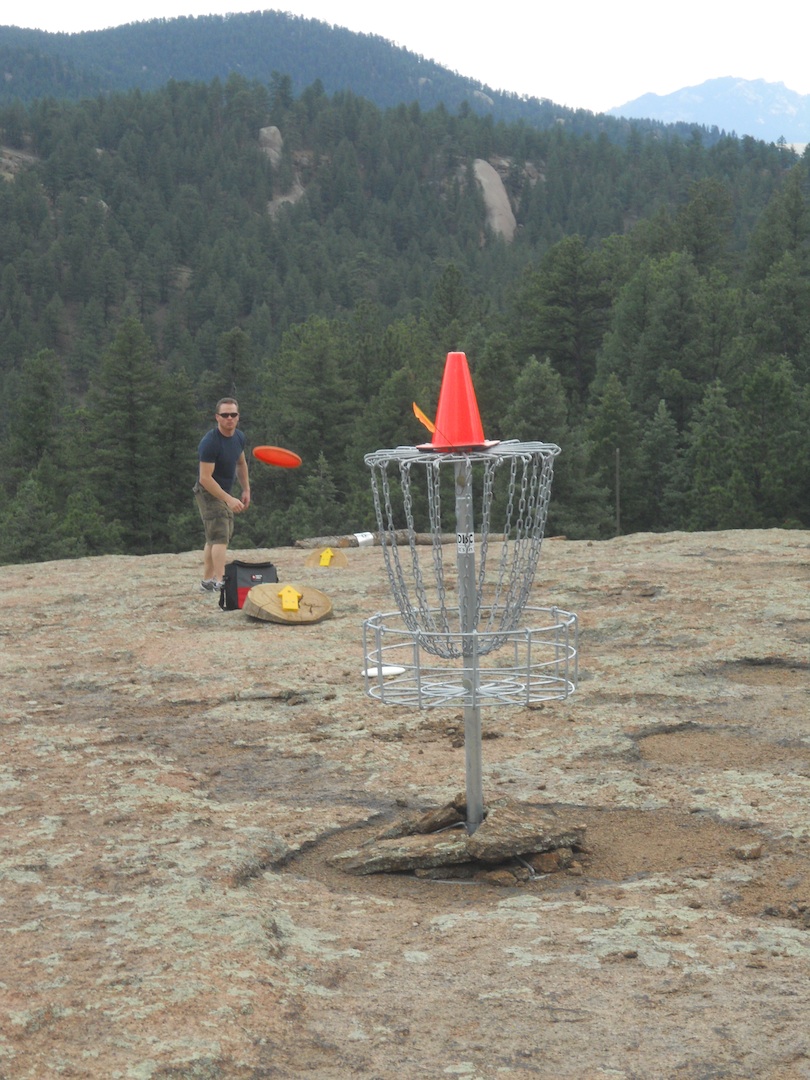
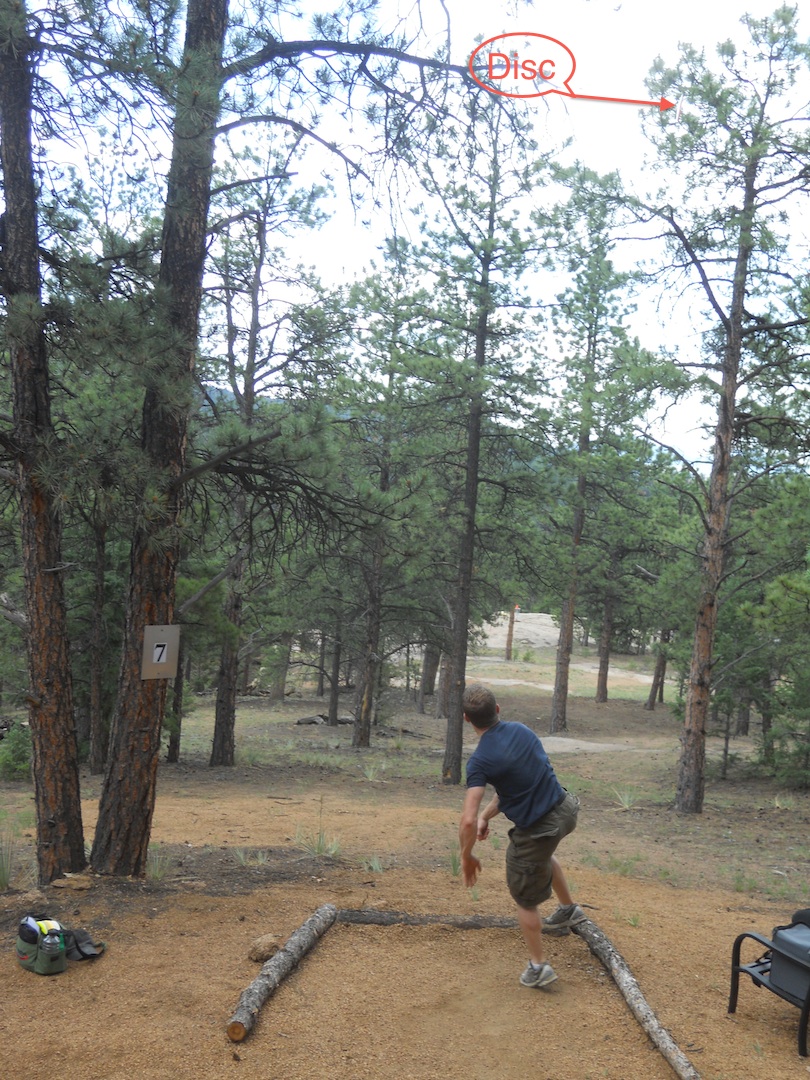
Moon Rock
Hole #7
Distance: 354
Elevation: -36
Plays Like: 281 |
.jpg) |
.jpg) |
.jpg)
Putting after having overthrown the basket on the approach.
|
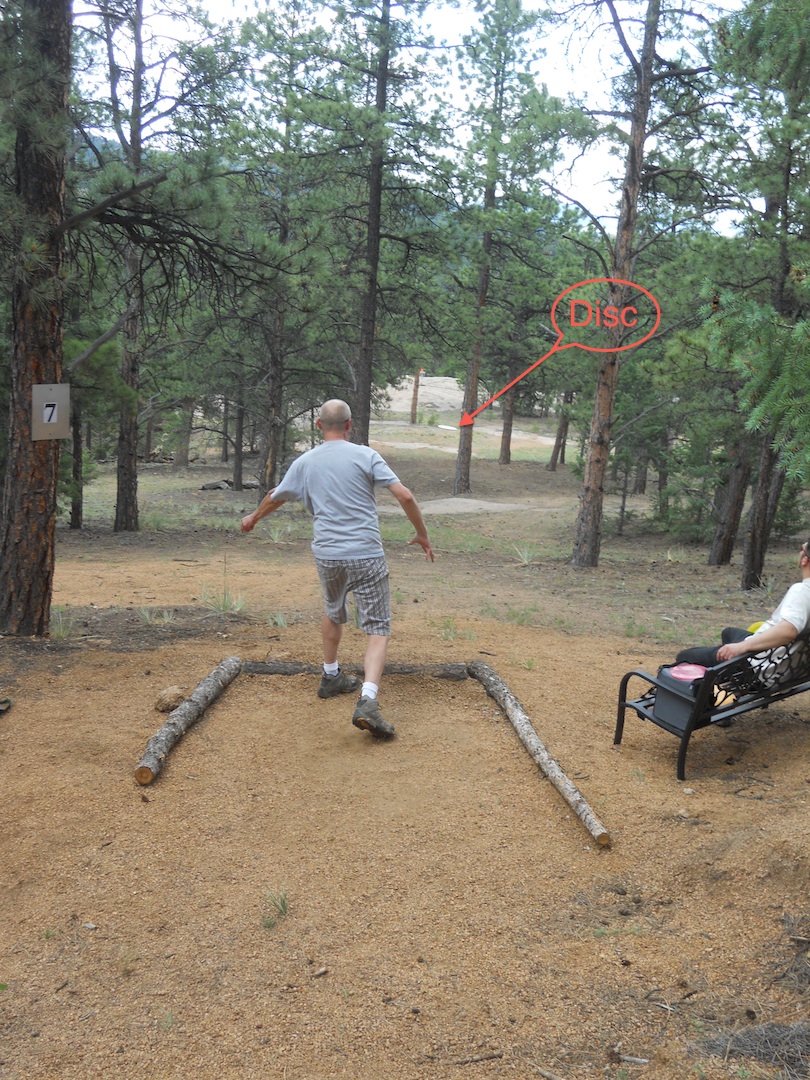
Moon Rock
Hole #7
Other Photos |
.jpg)
Tee shot straight toward the basket.
|
.jpg)
An overhead attempt.
|
.jpg)
Garth Marteeny putts to #7.
|
The next 3 holes (8-10) are called "Rockies 3" as they involve strenous terrain.
They can be skipped by going directly to #11 T-Box which is very near #7 Basket. |
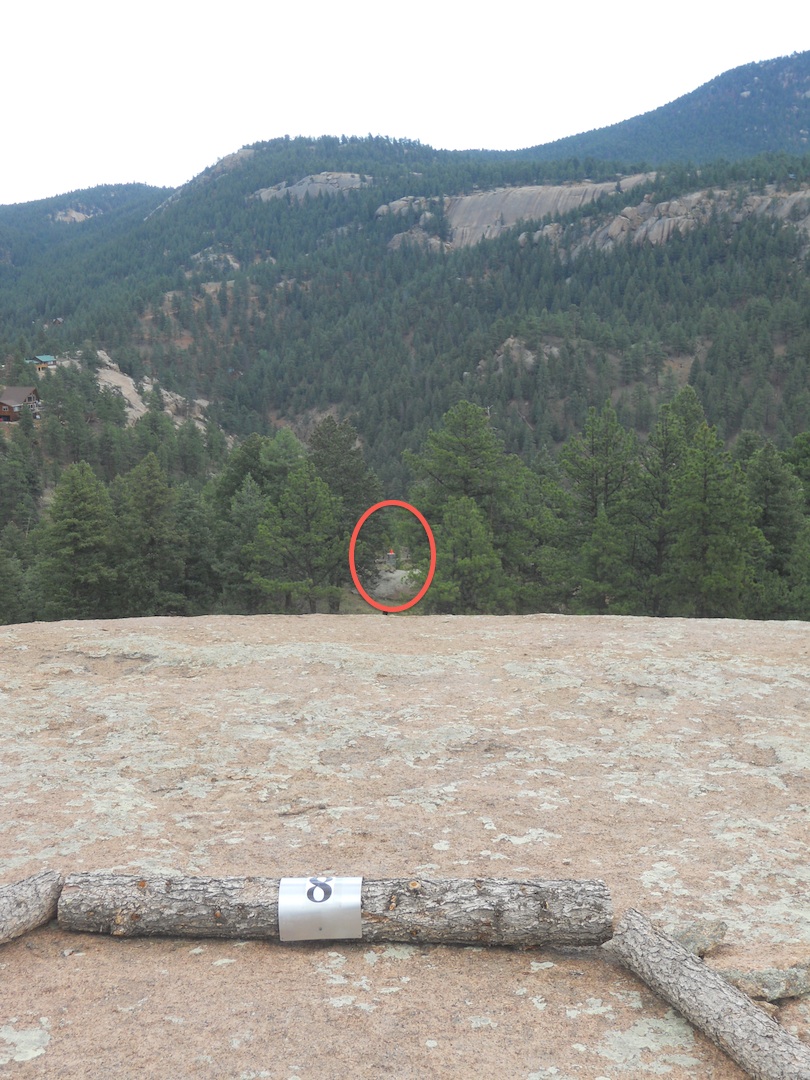
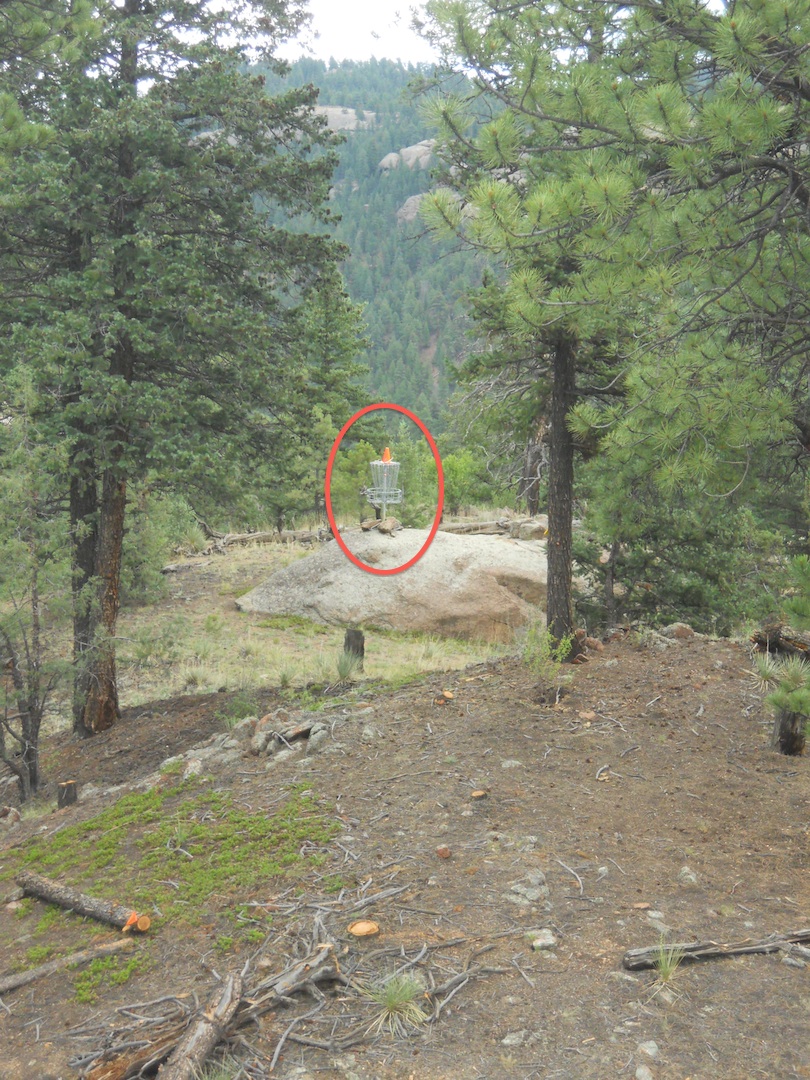
Island in the Sky
Hole #8
Distance: 321
Elevation: -61
Plays Like: 190 |
.jpg) |
.jpg) |
.jpg) |
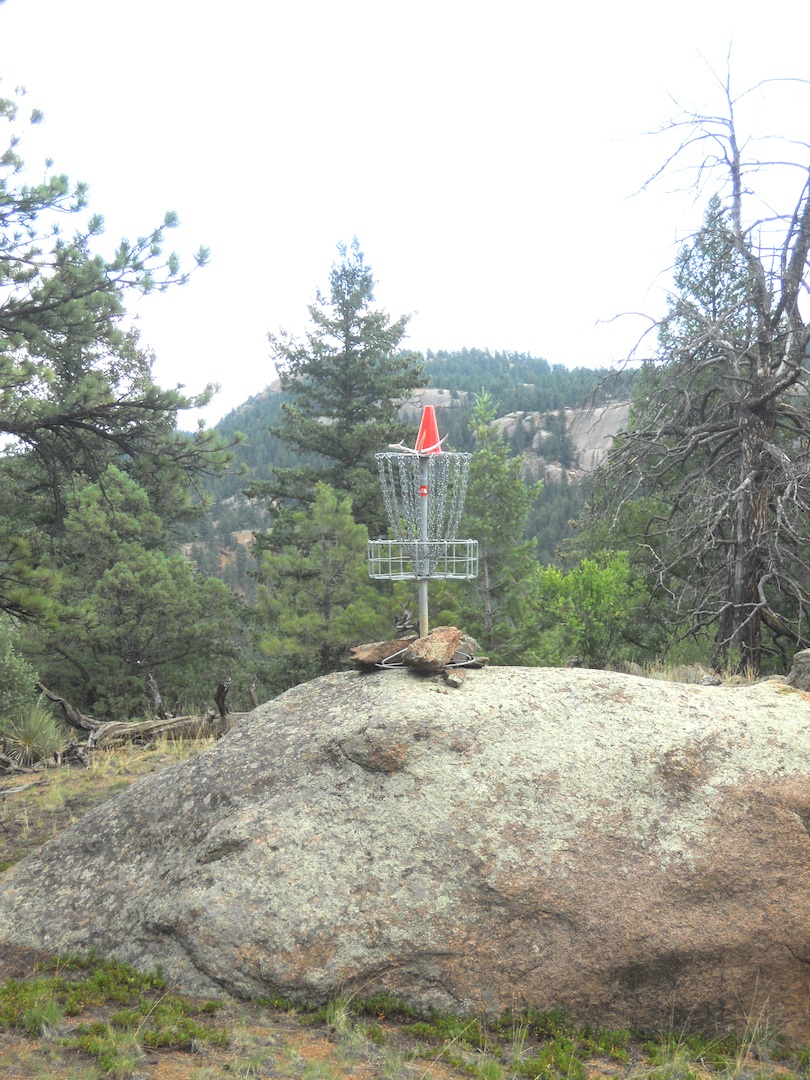
Island in the Sky
Hole #8
Other Photos |
.jpg) |
|
|
Formerly Shelf
Hole #9
Distance: 282
Elevation: 38
Plays Like: 396 |
Hole #9 was moved due to slippery rocks. Photos to come. |
|
|
Island on the Rock
Hole #10
Distance: 194
Elevation: 26
Plays Like: 271 |
.jpg) |
.jpg) |
.jpg) |
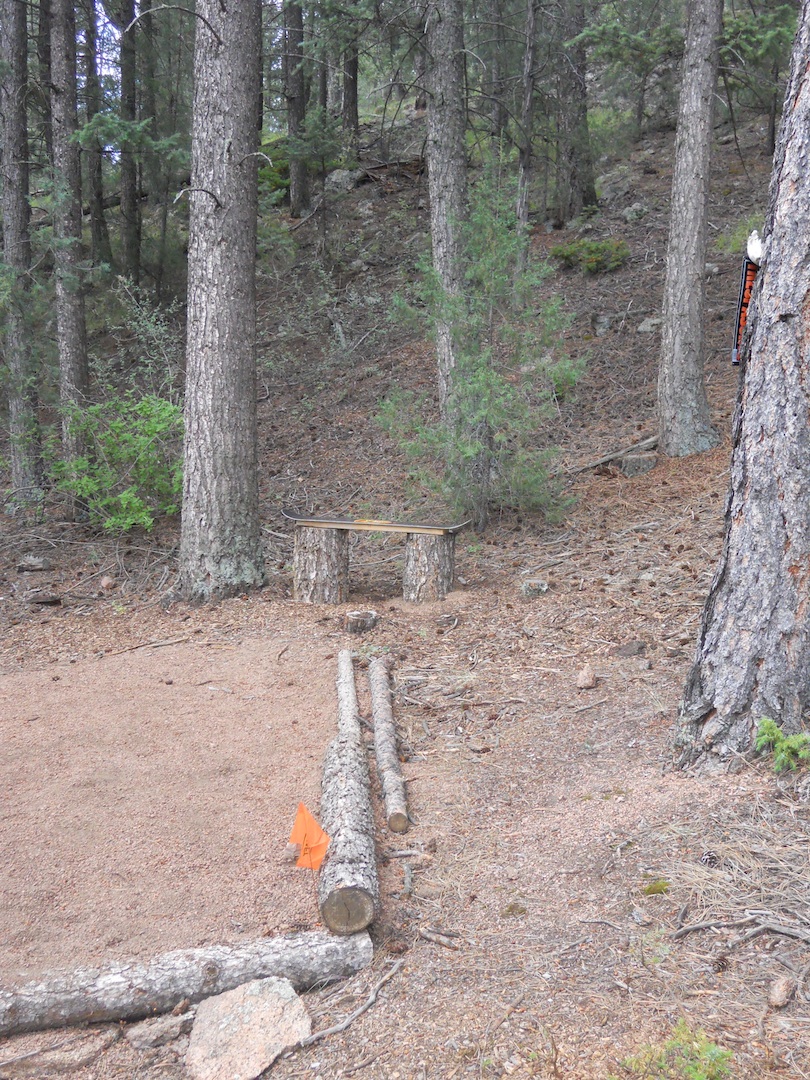
Island on the Rock
Hole #10
Other Photos |
.jpg)
There are benches at several T-Boxes. In time there will be benches at all T-Boxes.
|
|
|
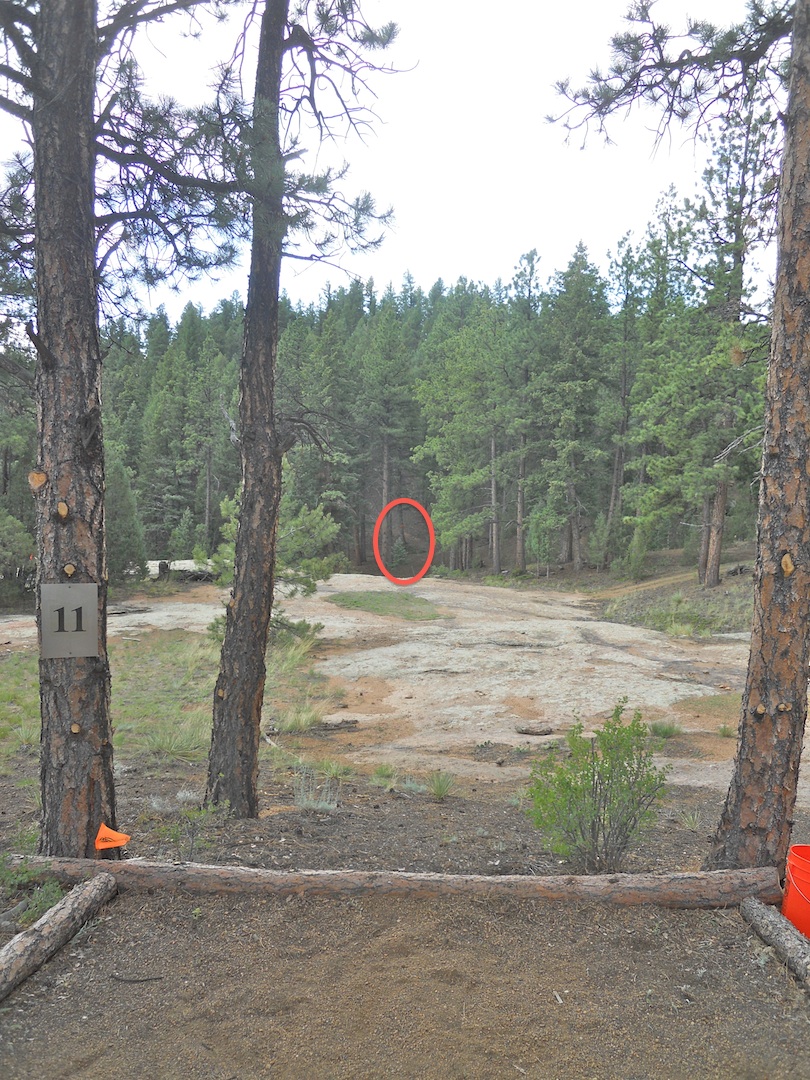
Dogleg Right
Hole #11 *
Distance: 342
Elevation: -8
Plays Like: 319 |
.jpg)
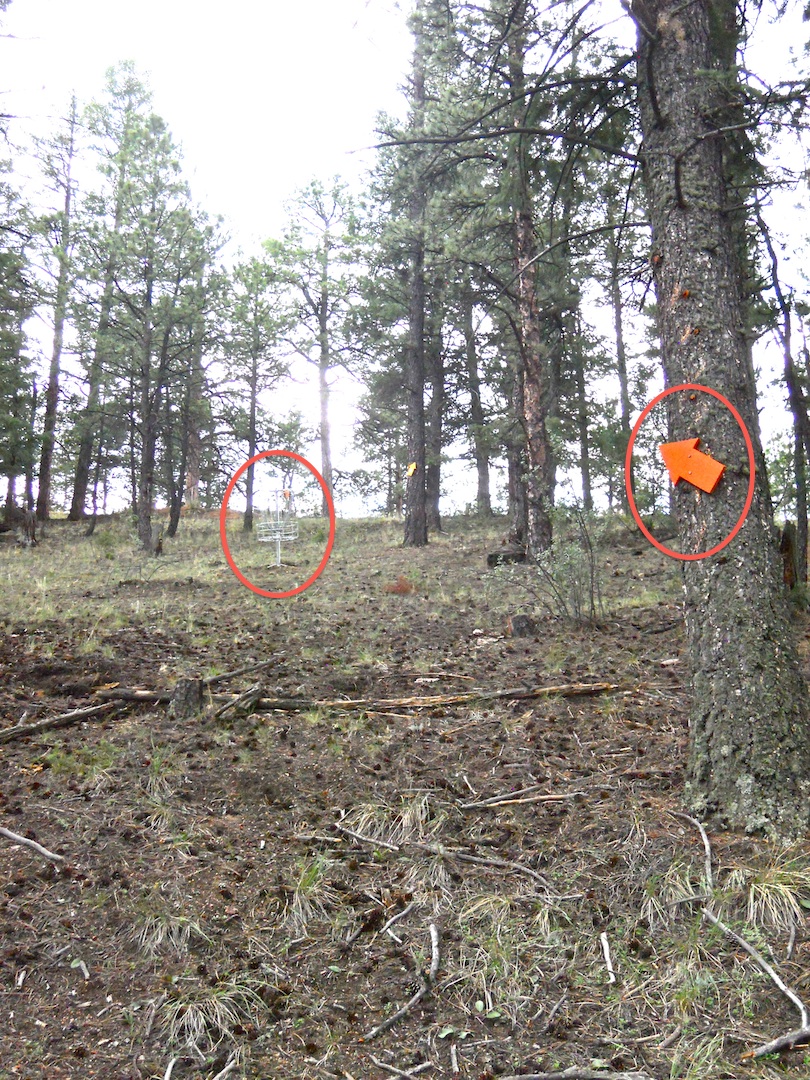
Circle highlights the orange arrow pointing at the basket.
|
.jpg)
Still looking at the orange arrow.
|
.jpg) |
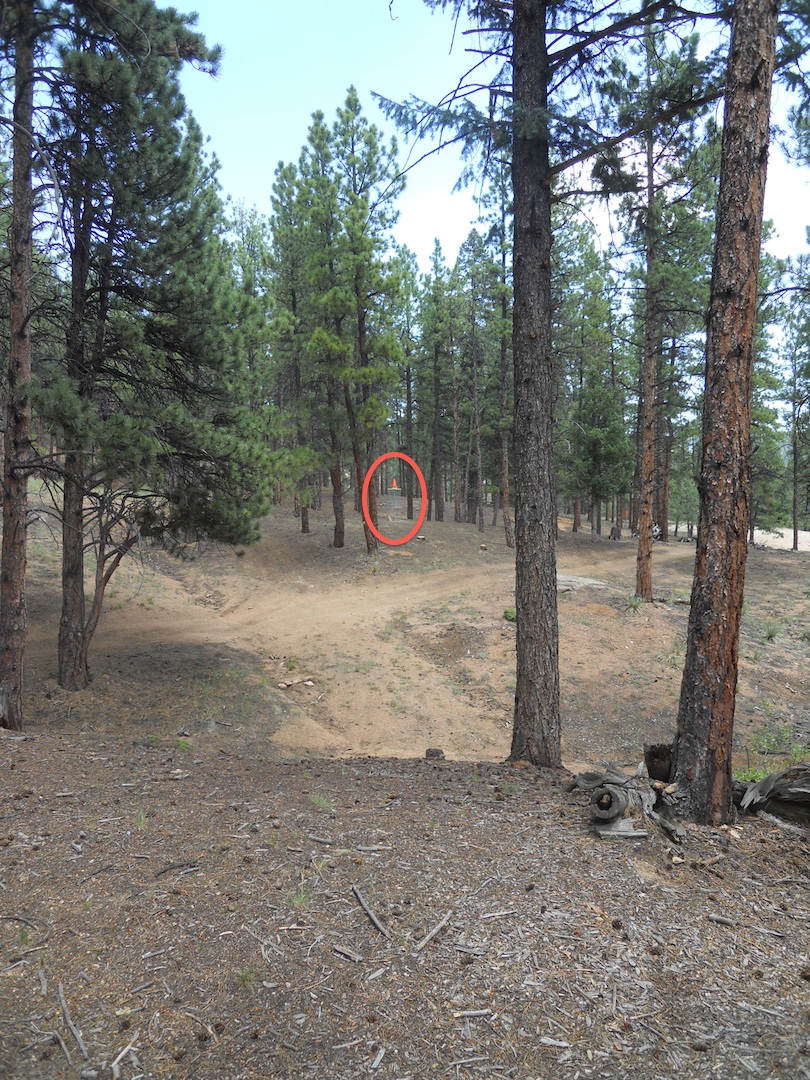
Dogleg Right
Hole #11 *
Other Photos |
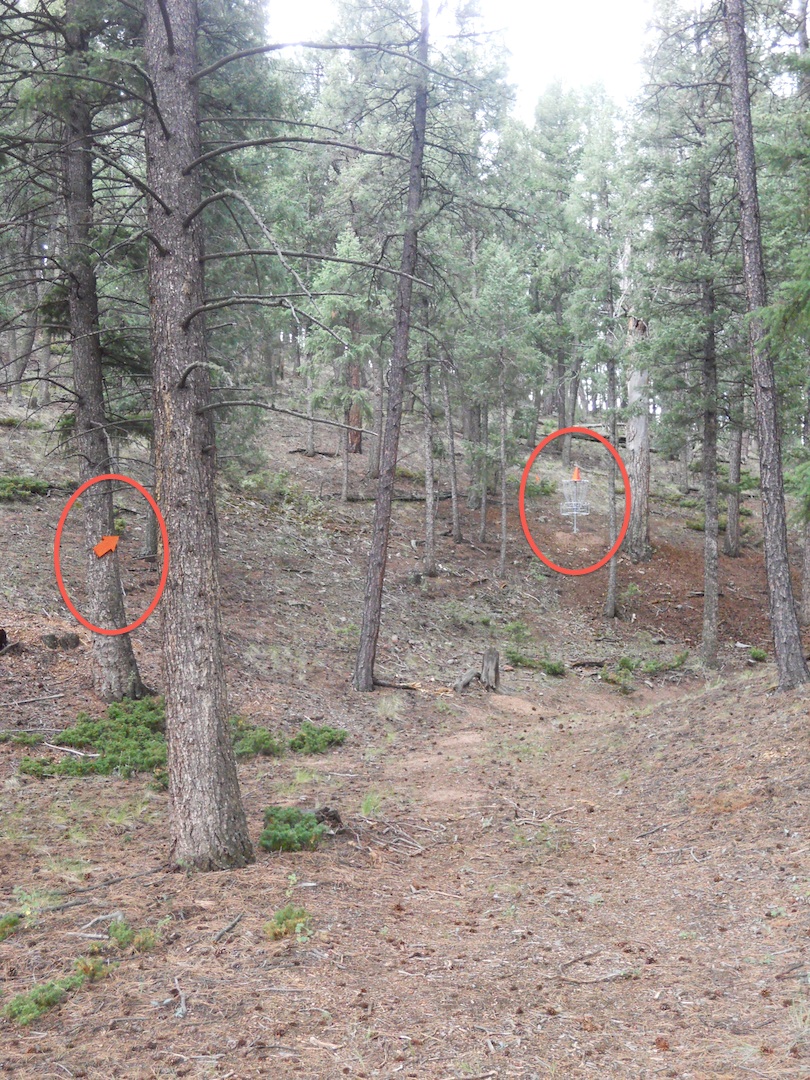
|
.jpg)
If you land just short of the orange arrow you have a clear shot at the basket. Note that both the arrow and the basket oare highlighted with a red oval.
|
|
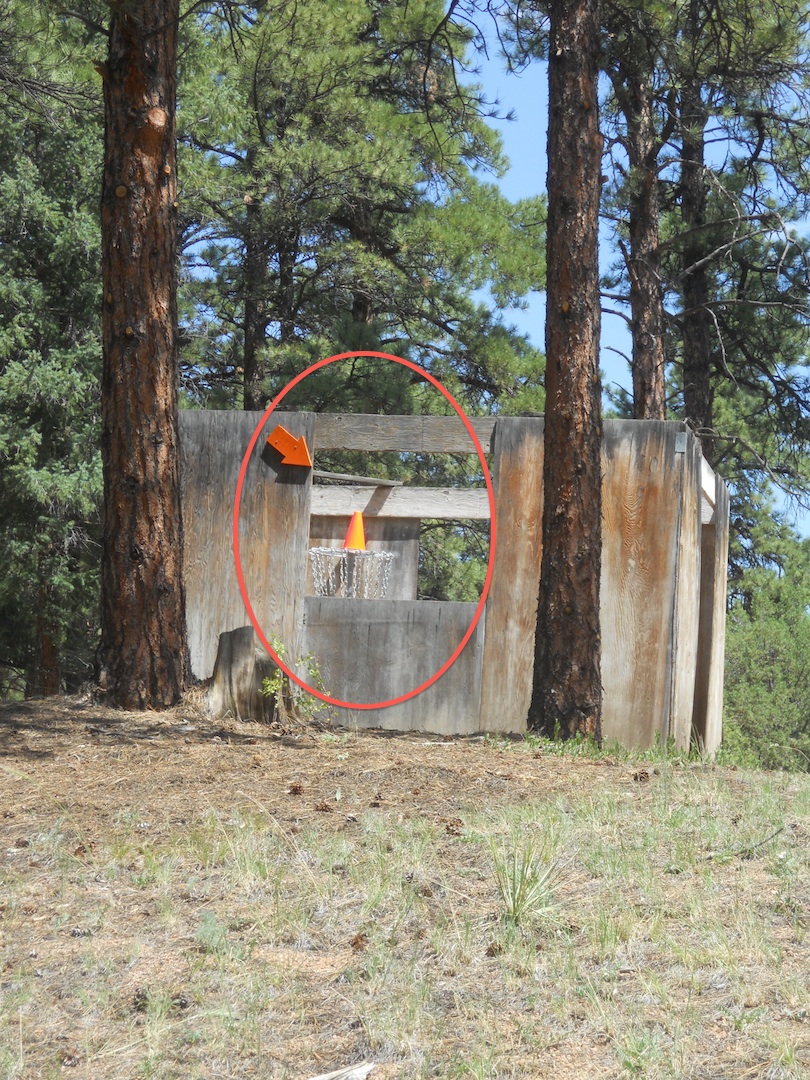
House
Hole #12
Distance: 252
Elevation: 3
Plays Like: 262 |
.jpg) |
.jpg)
Note the orange arrow pointing to the basket in the house.
|
.jpg)
The doorway into the house is on the right side. The other 3 sides have window openings.
|
House
Hole #12
Other Photos |
.jpg)
All T-Boxes have a sign similar to the one shown. No one should ever be confused as to what T-Box they are standing in.
|
|
|
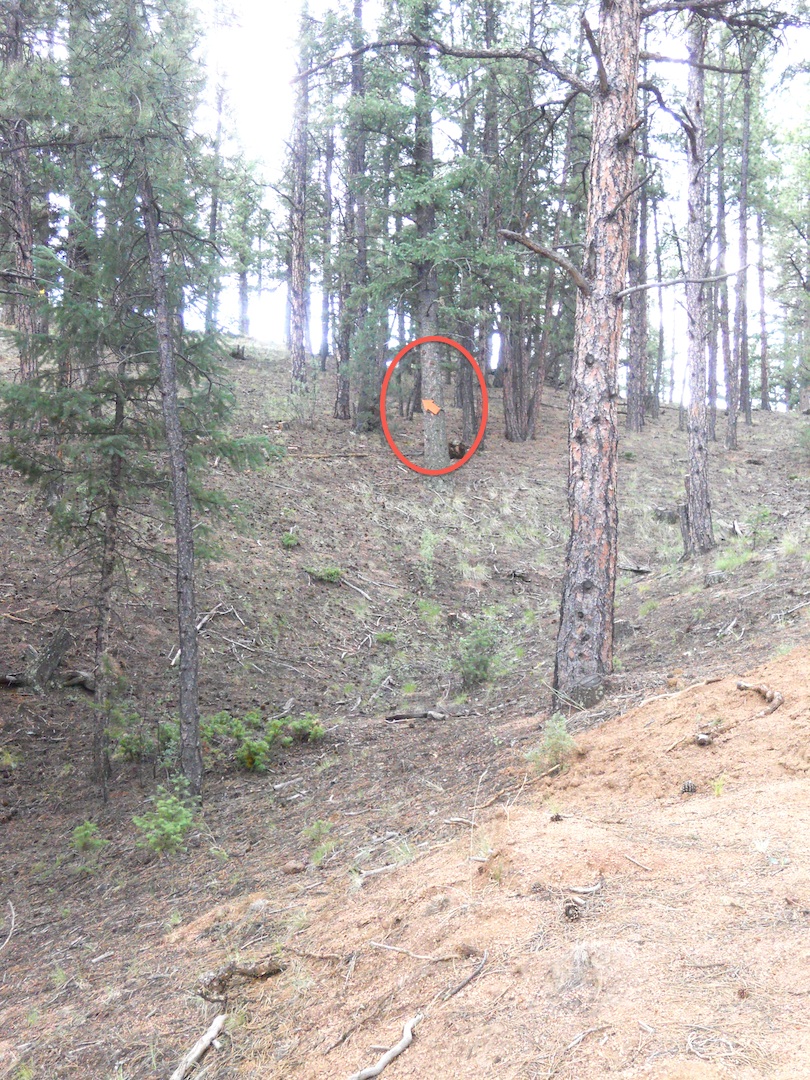
Dogleg Left
Hole #13
Distance: 336
Elevation: 33
Plays Like: 435 |
.jpg)
Another blind shot with an orange arrow pointing to the basket.
|
.jpg) |
.jpg) |
Dogleg Left
Hole #13
Other Photos |
.jpg)
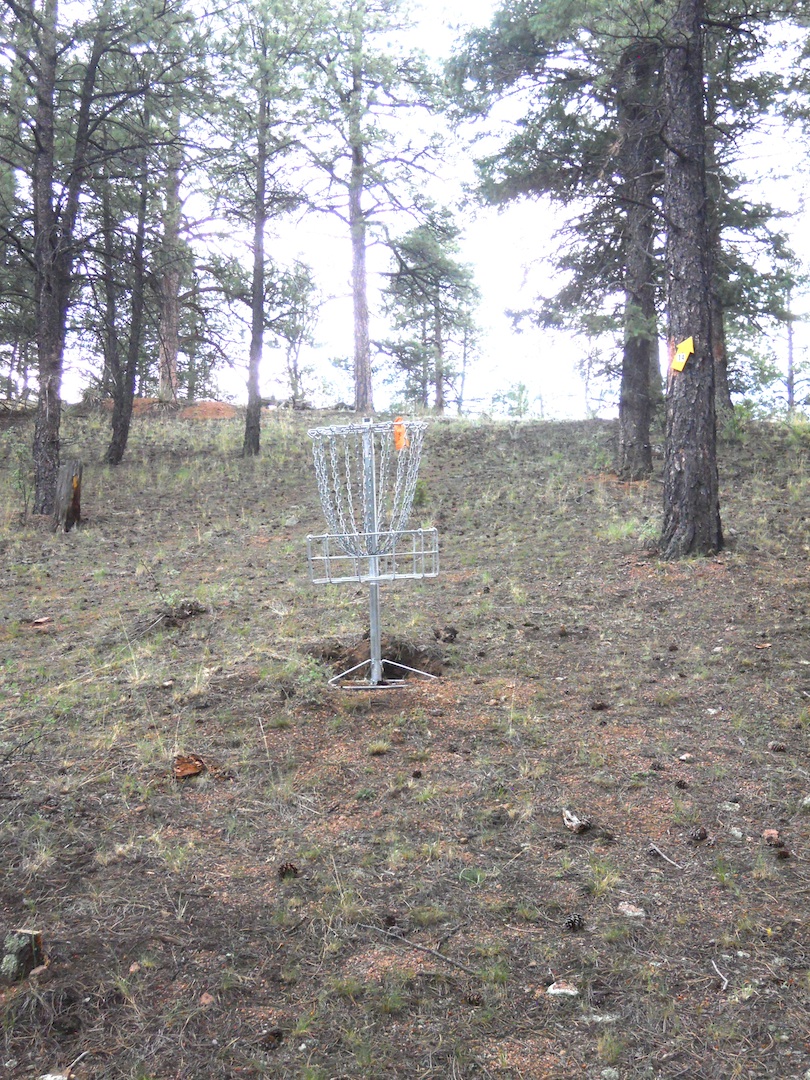
Yellow arrows throughout the course point players from a basket to the next T-Box.
|
.jpg)
From just below the blind shot orange arrow to the basket. Its 63 ft. and 15 ft. up from the arrow to the basket.
|
.jpg)
Looking down the hill at the basket.
|
Snag
Hole #14
Distance: 161
Elevation: 20
Plays Like: 220 |
.jpg) |
.jpg) |
.jpg)
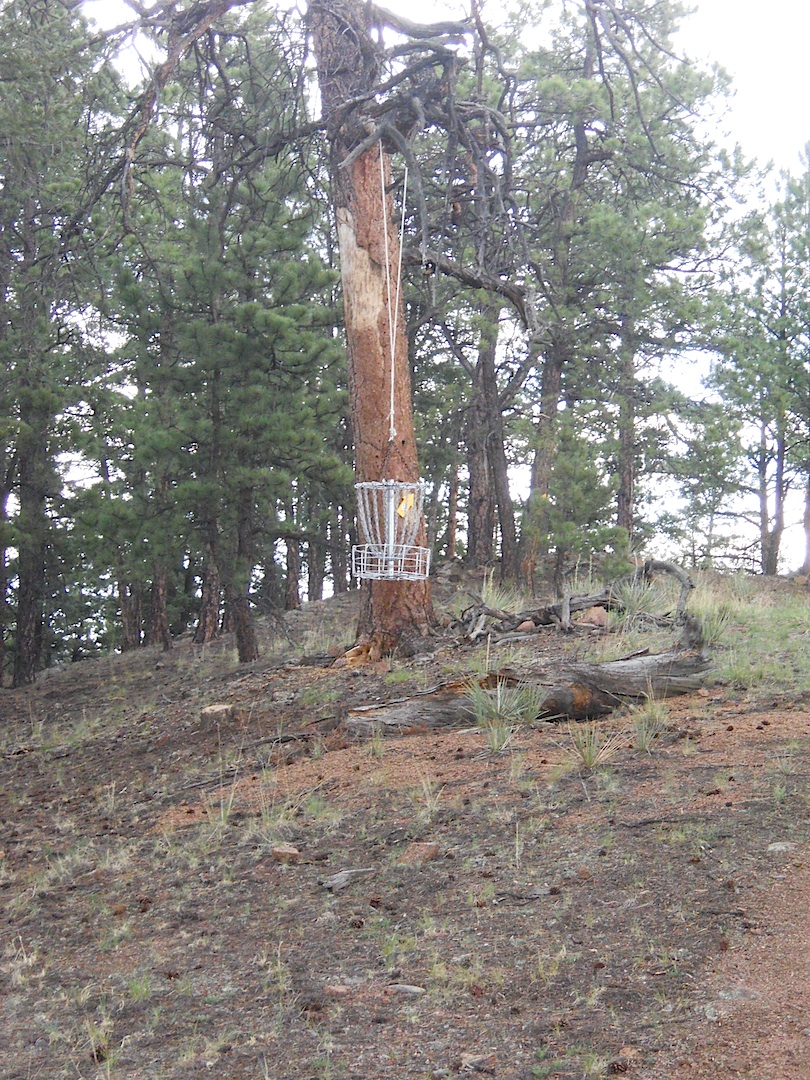
Hanging basket from the right side.
|
Goodbye
Hole #15
Distance: 177
Elevation: -11
Plays Like: 154 |
.jpg) |
.jpg) |
.jpg)
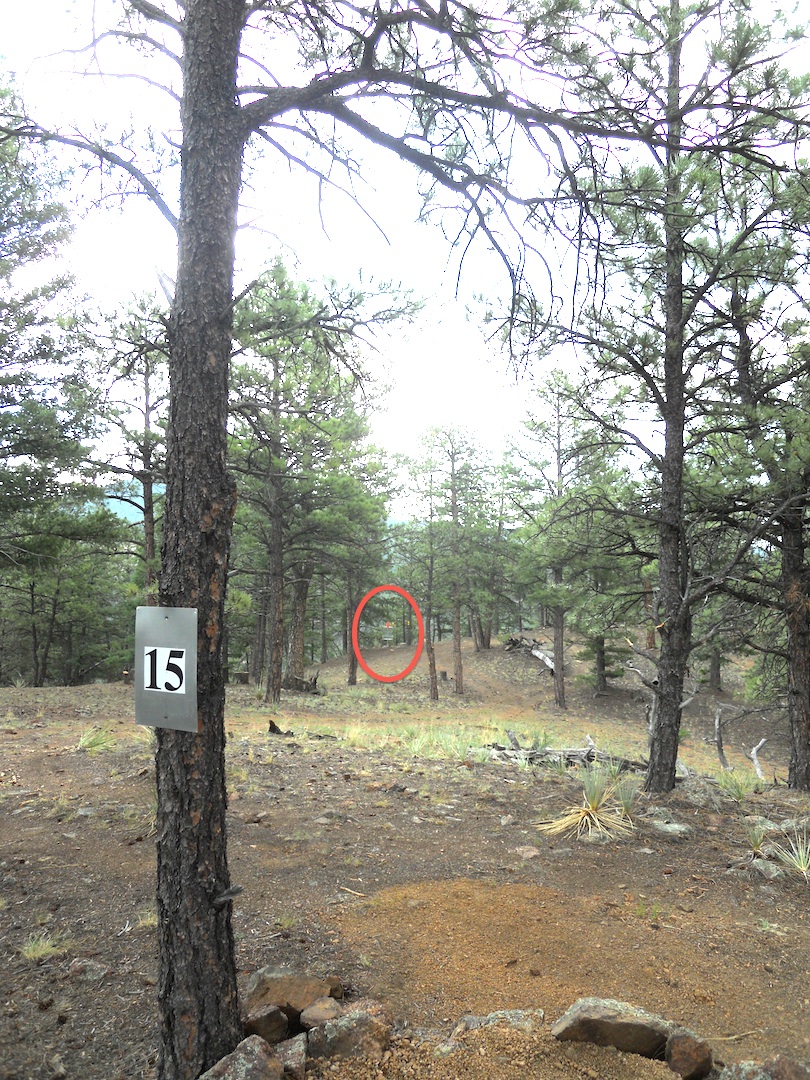
It's not hard to see why you don't want to go long here. You are fairly safe unles syou go past the trees (30 ft. or so) but then it is goodbye.
|
Elk Creek
Hole #16
Distance: 203
Elevation: 4
Plays Like: 215 |
.jpg) |
.jpg) |
.jpg)
Basket from the right side. Don't overthrow your putt and don't be left on your drive or approach. I've seen close shots end up 200 ft. away.
|
Trouble
Hole #17
LONG
Distance: 222
Elevation: -5
Plays Like: 212 |
.jpg) |
.jpg) |
.jpg)
If you go more than about 30 ft. long you will go over a dropoff.
|
Trouble
Hole #17
LONG
Other Photos |
|
.jpg)
Basket from the right side. Spectacular view.
|
.jpg)
Be cautious of that putt from the right side or driving to the left of the basket.
|
Trouble
Hole #17
SHORT
Distance: 161
Elevation: -6
Plays Like: 141 |
.jpg) |
|
|
The next 5 holes (18-22) are called "Himalayn 5" for a reason as they involve VERY strenous terrain.
They can be skipped by going directly to #23 T-Box which is very near #17 Basket. |
V-Tree
Hole #18
Distance: 204
Elevation: -68
Plays Like: 67 |
New Hole. Photos to come. |
|
|
Crack
Hole #19
Distance: 162
Elevation: 13
Plays Like: 202 |
New Hole. Photos to come. |
|
|
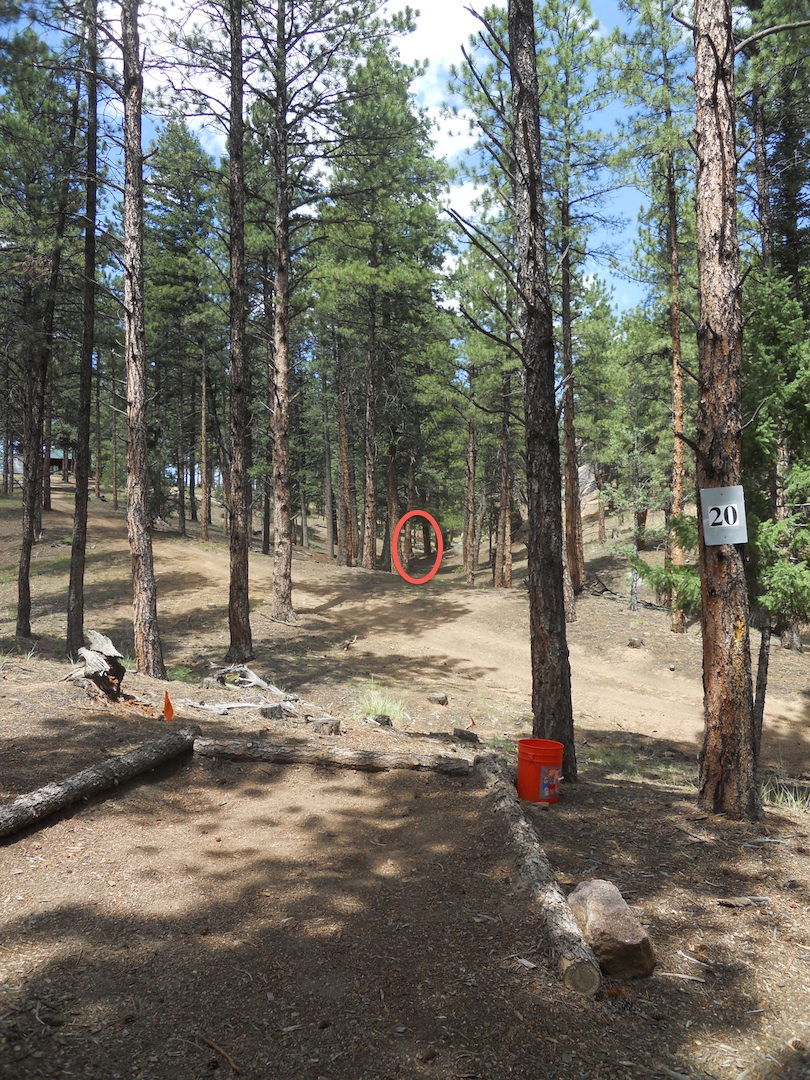
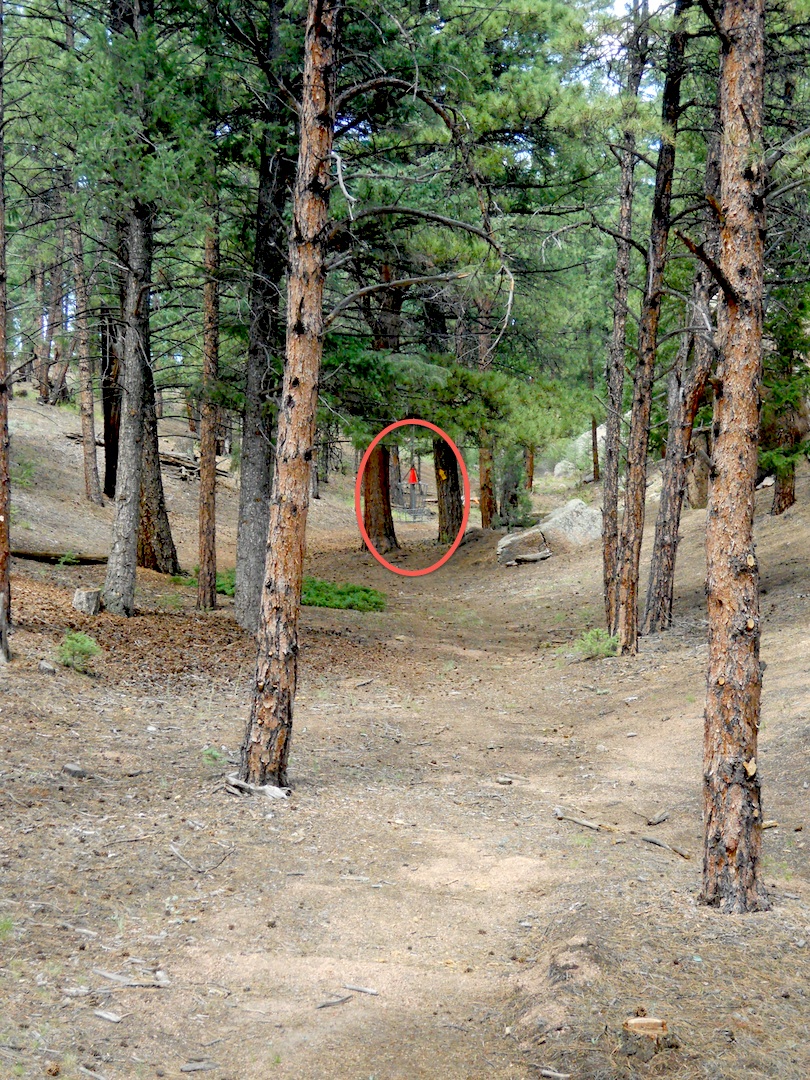
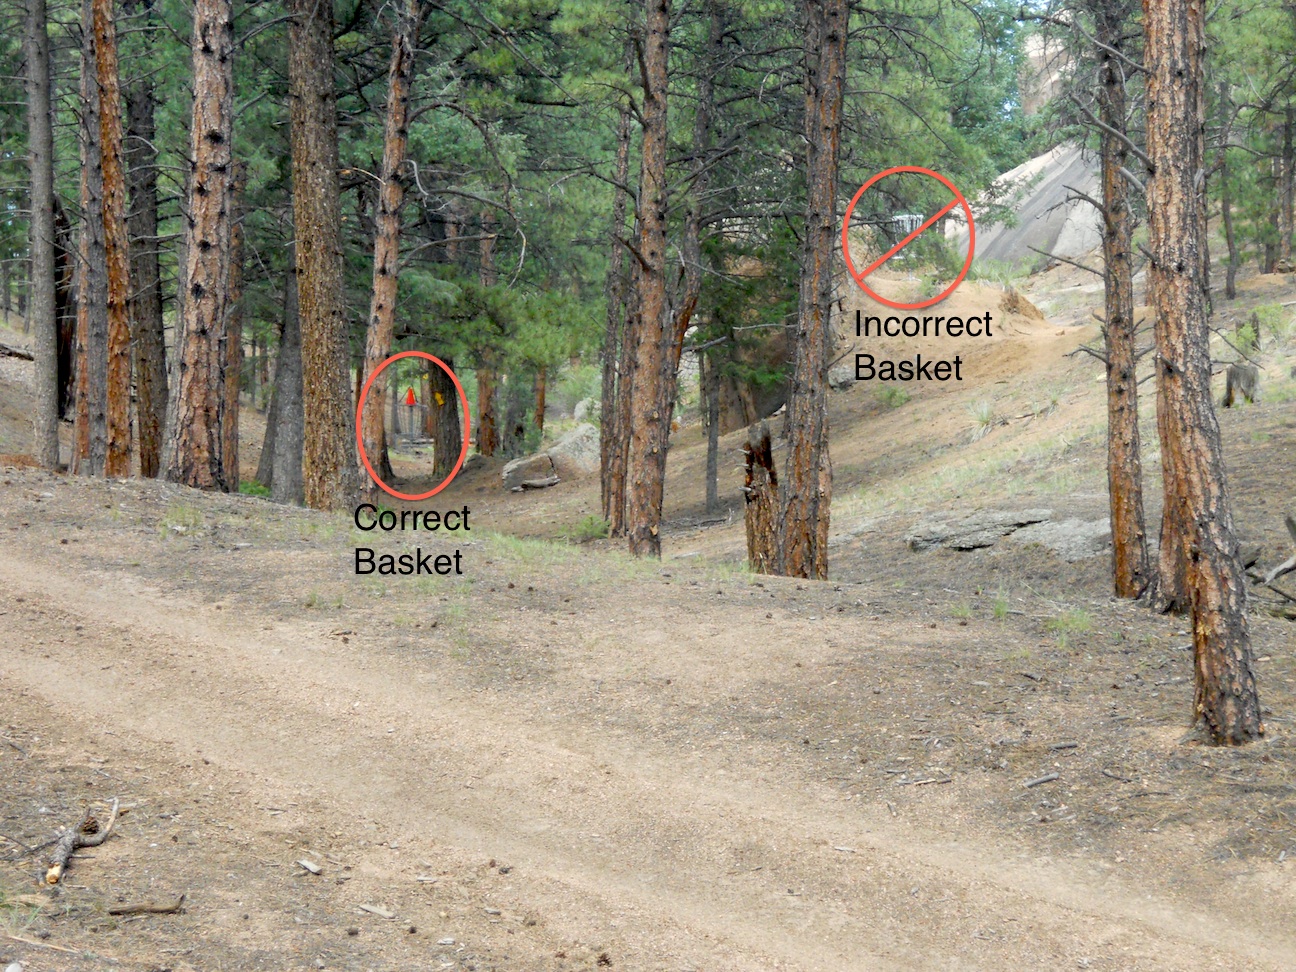
Ledge
Hole #20
Distance: 180
Elevation: 29
Plays Like: 267 |
New Hole. Photos to come. |
|
|
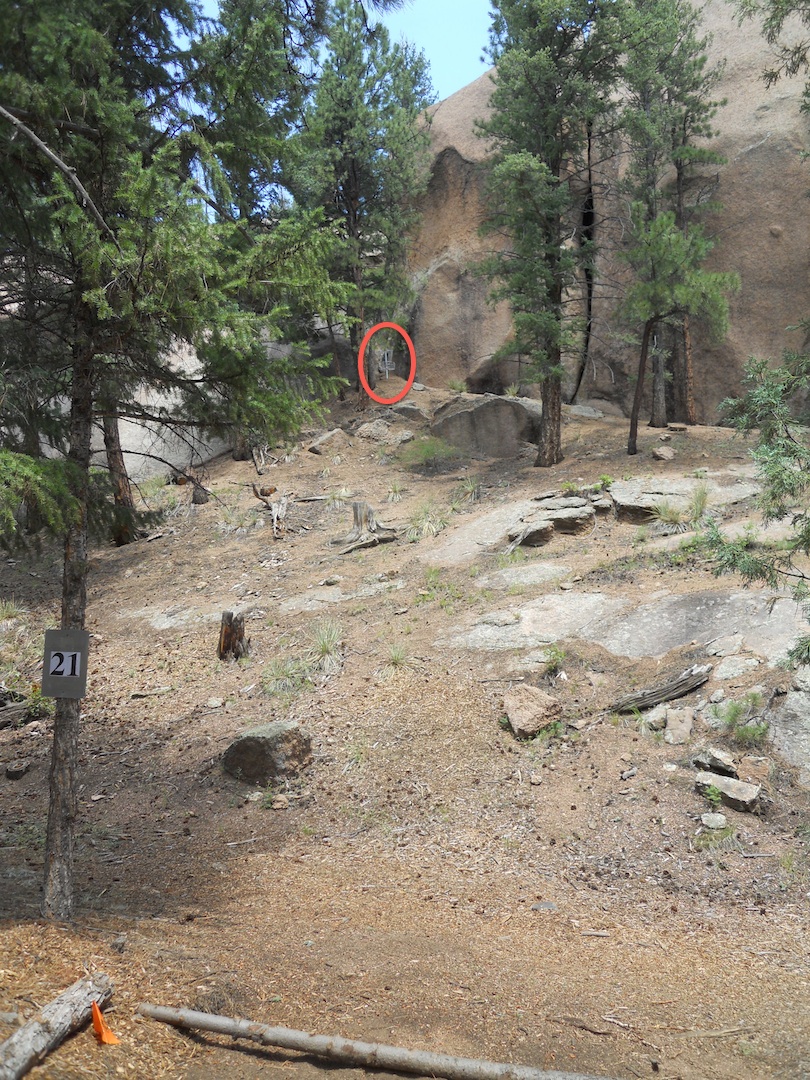
Canyon
Hole #21
Distance: 158
Elevation: -30
Plays Like: 97 |
New Hole. Photos to come. |
|
|
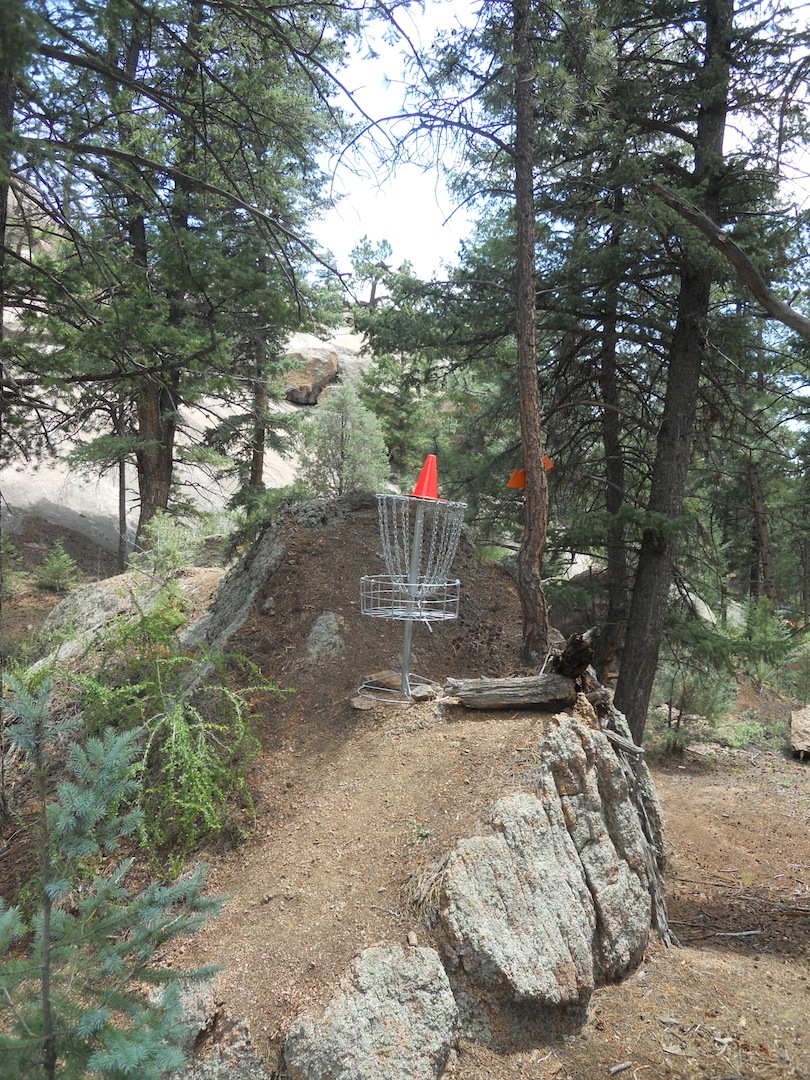
Back to Reality
Hole #22
Distance: 245
Elevation: 41
Plays Like: 367 |
New Hole. Photos to come. |
|
|
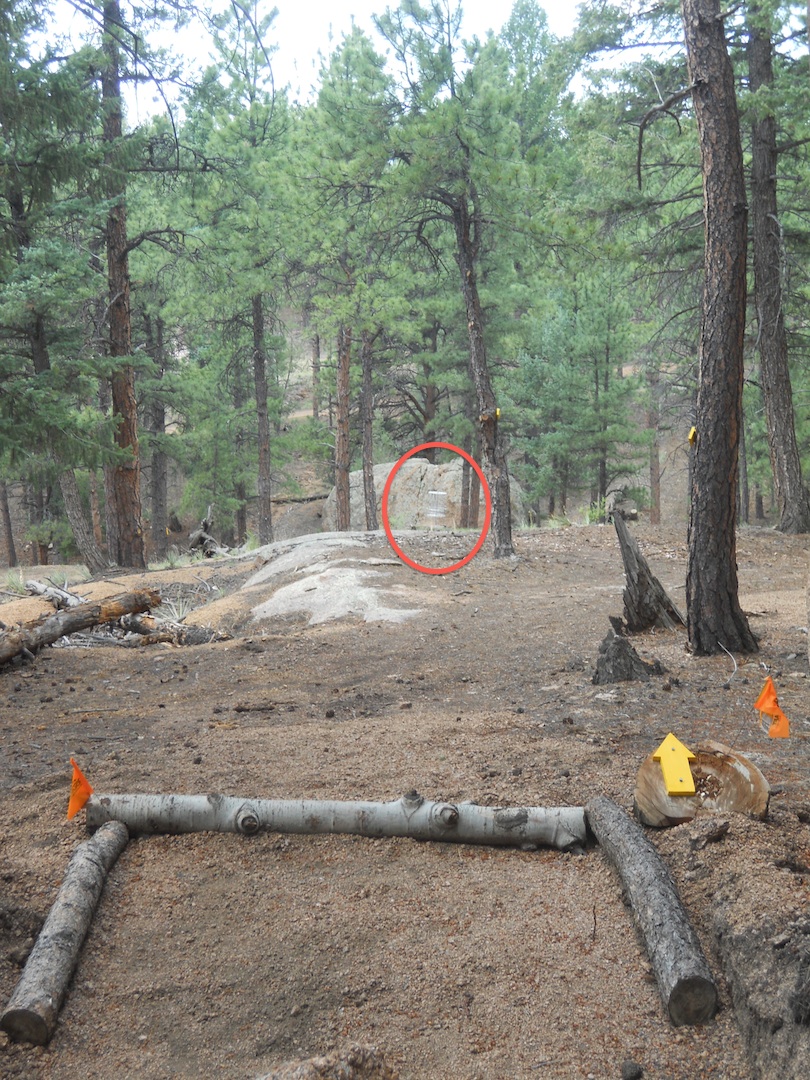
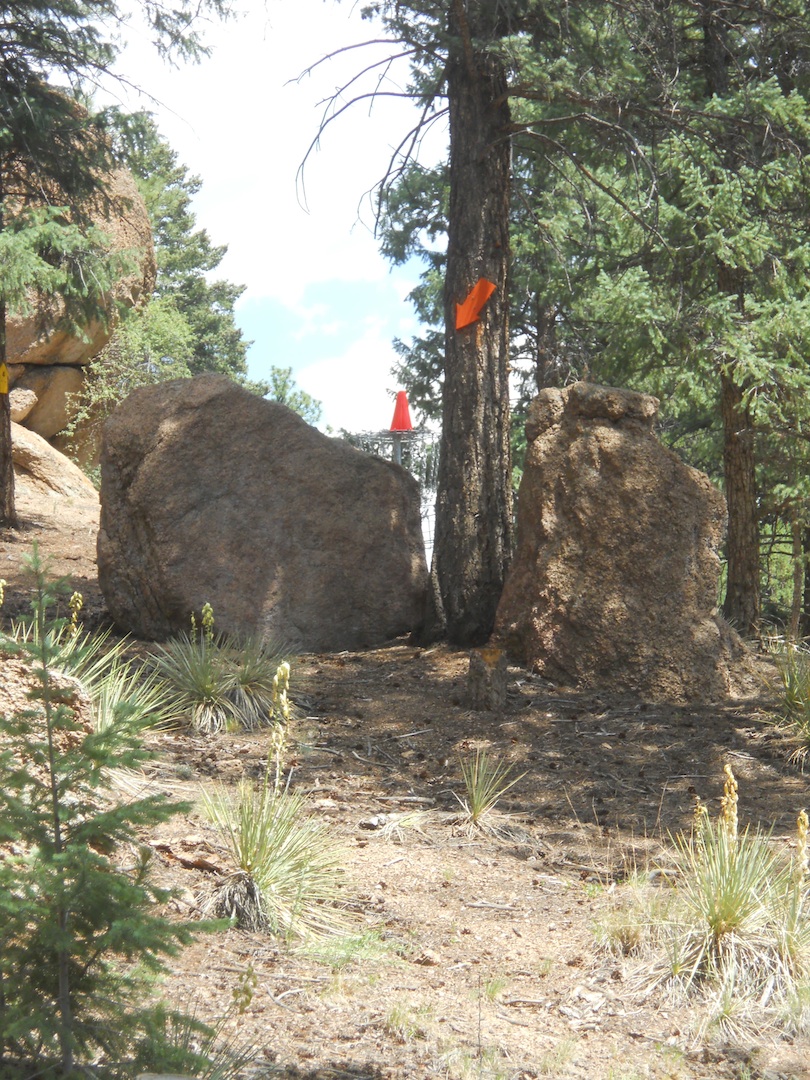
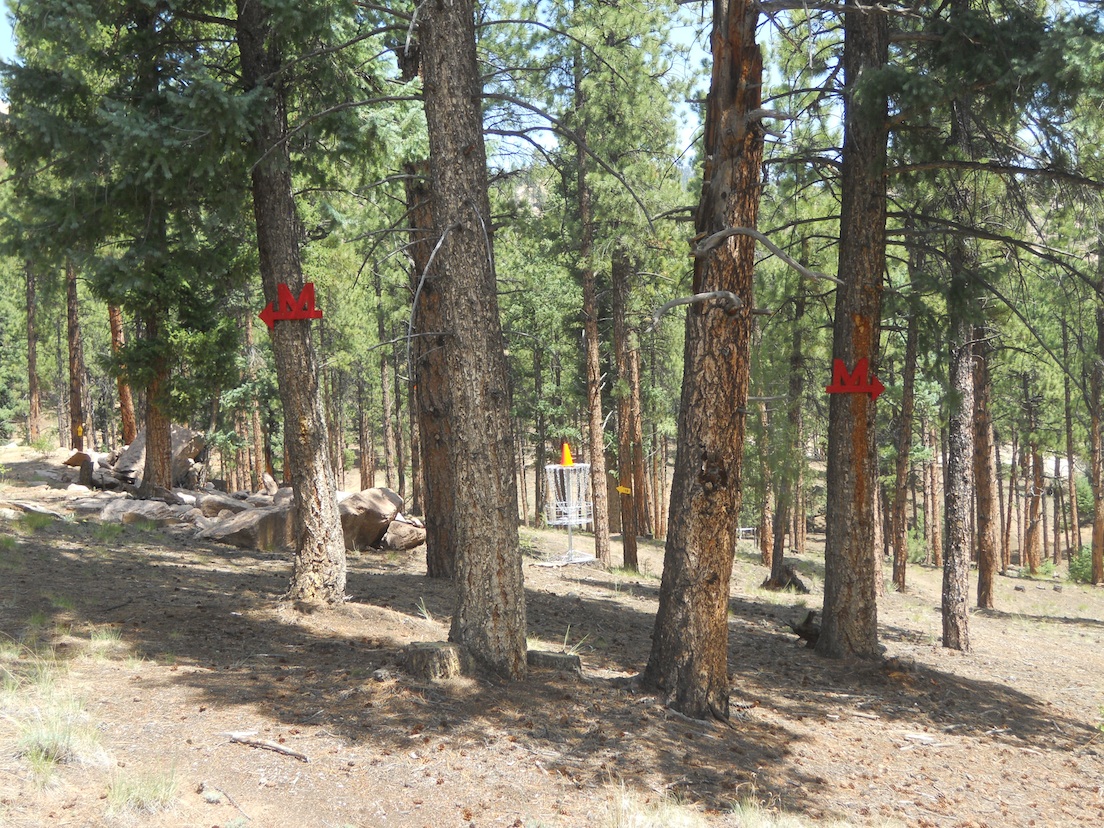
Double Reverse Mando
Hole #23
Distance: 183
Elevation: -6
Plays Like: 166 |
.jpg)
The basket is not quite visible from the T-Box but the orange arrow pointing to it and the Mando signs are visible.
|
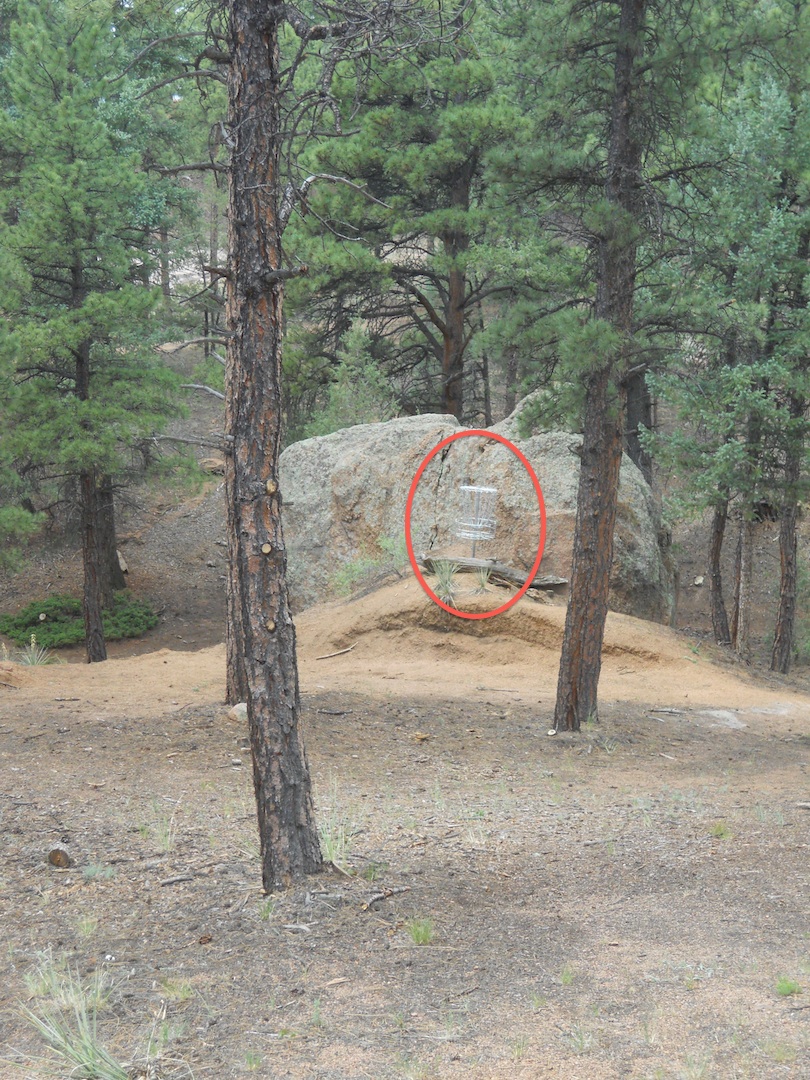
.jpg)
Once over the rise the basket can be seen between the trees. Note that the Mando signs point outward. The path of the disc must pass outside the Mando signs and may not pass between the trees. Thus the name.
|
.jpg)
The orange arrow pointing to the basket is very close to the same distance from the T-Box as the basket.
|
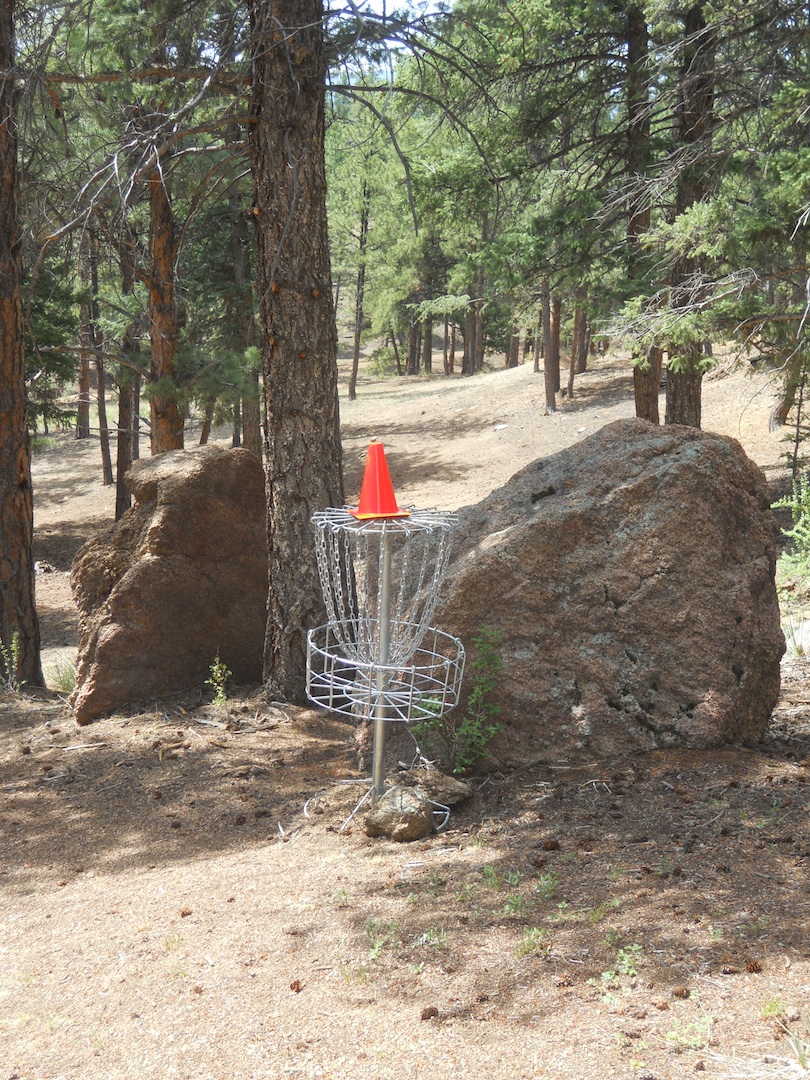
Gauntlet
Hole #24
Distance: 321
Elevation: -19
Plays Like: 265 |
.jpg) |
.jpg) |
.jpg)
Although from T-Box to Basket is only down 19 ft. most shots that make it through the trees end up in a small ravine and must then throw up about 15 ft.
|
Gauntlet
Hole #24
Other Photos |
|
.jpg)
From the left of the line from T-Box to Basket the view is more clear. The 2 close trees in the right of the photo are the ones that form the "V" seen from the T-Box.
|
|
Up the Creek
Hole #25
Distance: 208
Elevation: 8
Plays Like: 229 |
.jpg) |
.jpg) |
.jpg)
Yes, another hanging basket.
|
Up the Creek
Hole #25
Other Photos |
|
.jpg)
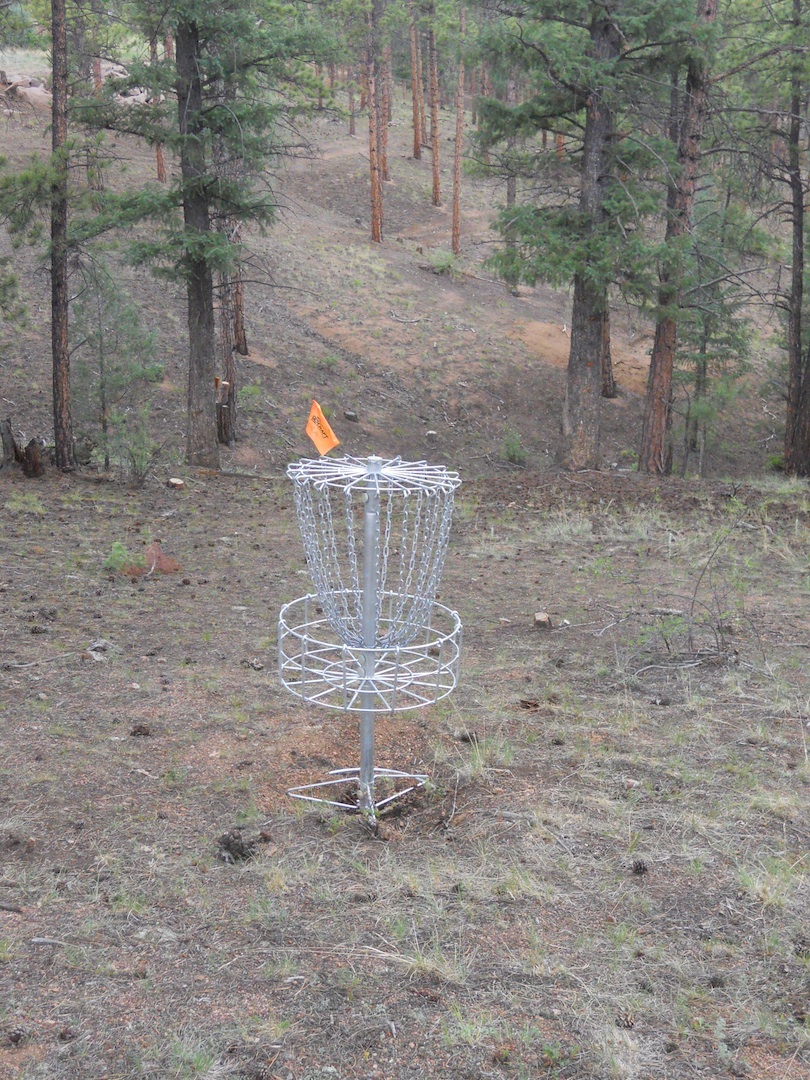
On the approach and from the T-Box a Basket can be seen up higher on the hill to the right. That's Basket #2 and does not have a cone on it.
|
|
Up the Hill
Hole #26
Distance: 111
Elevation: 38
Plays Like: 226 |
.jpg)
It's not that far away but it is way up.
|
.JPG) |
.JPG) |
Up the Hill
Hole #26
Other Photos |
|
.JPG)
If your drive is to the right, There is a clear shot at the basket and not as steep.
|
|
On the Dam
Hole #27
Distance: 136
Elevation: 11
Plays Like: 170 |
.JPG)
There is virtually no straight shot at the basket. It's either a big right or left turn.
|
.JPG)
Approach from the right.
|
.JPG)
The basket from the vantage point of a drive or approach that went beyond the basket. However the dropoff on both sides is steep but not too deep.
|
On the Dam
Hole #27
More Photos |
.JPG)
There just happened to be some wildlife hanging out at the #22 T-Box the day i was taking pictures.
|
.JPG)
Approach from the left.
|
|
Easter Island
Hole #28
Distance: 237
Elevation: -15
Plays Like: 207 |
New Hole. Photos to come. |
|
|
* #4 - 93 ft. to the bend to go into the cave and 10 ft. up, then 24 ft. to the basket and 11 ft. up
* #11 - 263 ft. to the bend and 23 ft. down then 80 ft. to the basket and 15 ft. up
* #13 - 273 ft. to the bend and 17 ft. up then 63 ft. to the basket and 15 ft. up